English
2 ©TitanToolInc.Allrightsreserved.
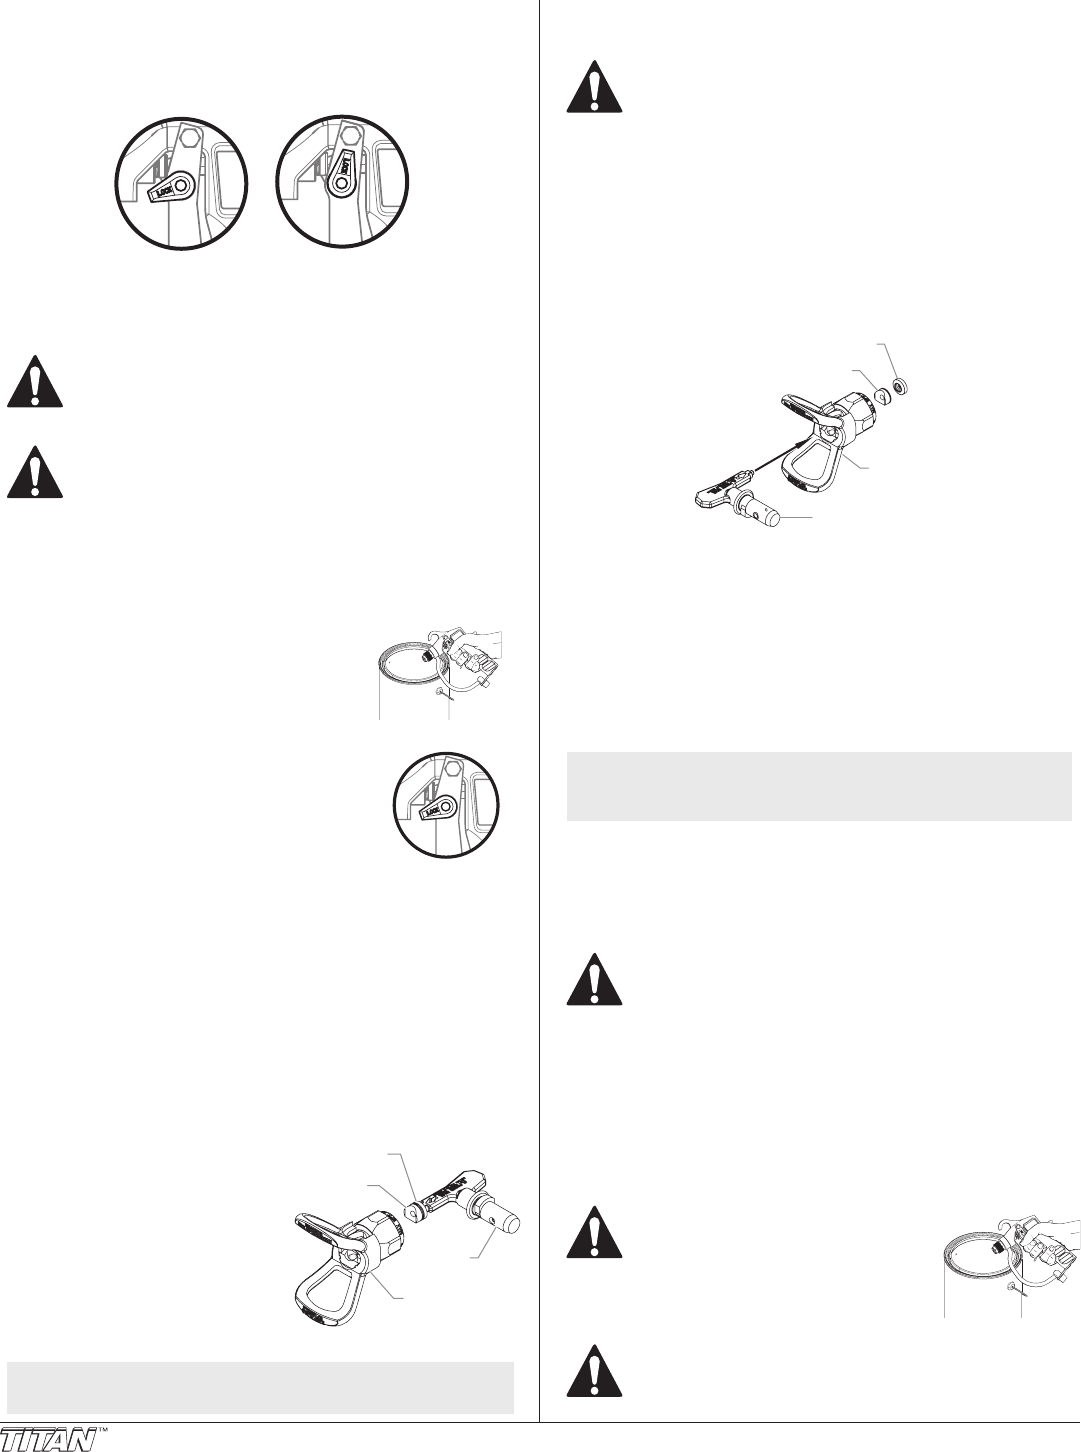
Using the Gun Trigger Lock
Alwaysengagethegun’striggerlockwhenthegunisnotinuse.
1. Tolockthetrigger,rotatethetriggerlockforwarduntilitstops.
2. Tounlockthetrigger,rotatethetriggerlockbackwarduntilitis
vertical.
Trigger locked
Tr
igger unlocked
(gun will spray)
Setup
Never attempt to assemble, change, or clean the gun, tip,
or tip guard without first relieving pressure from the spray
system. Follow the “Pressure Relief Procedure” in the
sprayer’s Owner’s Manual.
Always use a tip safety guard for added protection against
injection. Beware that the guard alone will not prevent
injection. Never cut off tip guard! Always engage gun trigger
lock when the gun is not in use. Before servicing equipment,
consult Owner’s Manuals and follow all warnings.
Pressure Relief Procedure
1. Movethesprayunit’sON/OFFswitchtotheOFFposition.
2. Turnthesprayunit’spressurecontrolknobcounterclockwisetoits
lowest setting.
3. Holdthemetalpartofthegunrmlyto
the side of a metal container to ground
thegunandavoidabuildupofstatic
electricity.
4. Triggerthegunintothecontainerto
removeanypressurethatmaystillbein
the hose.
Trigger locked
(gun will not spray)
Trigger unlocked
(gun will spray)
5. Lockthegunbyturningtheguntrigger
lock to the locked position.
6. Turnthesprayunit’sPRIME/SPRAY
valvetothePRIMEposition.
Assembling the Gun and Tip Assembly
IMPORTANT: Before attaching a gun to a grounded high pressure airless
hose, make sure that the airless spray unit is turned off and that fluid
pressure has been relieved from the system.
Assembling the Gun
1. Connectahighpressureuidhosetothematerialinletonthegun.
Tighten securely with a wrench.
2. Withthetipandtipguardothegun,startthesprayunit.Flushthe
systemaccordingtothemanufacturer’srecommendation.Inspect
the unit to make sure that all ttings are secure and that there are no
leaks.
3. Performthe“PressureReliefProcedure”describedearlierinthis
manual.
Seal
Tip Guard
Tip Seal
Tip
Assembling the Tip
1. Usingthetiphandle,insert
the tip seal and seal into the
backofthetipguard.Press
in for nal adjustment.
2. Insertthetipintothesloton
the tip guard.
3. Threadthetipguardonto
the gun. Position the tip
guard in the desired spraying
position,thentighten
securelybyhand.
NOTE: The arrow on the tip handle should be pointing in the
forward direction for spraying.
Changing a Tip
Tipscanberemovedandreplacedeasilywithoutdisassemblingthegun.
Never attempt to change or clean the tip or tip guard without
first performing the “Pressure Relief Procedure.”
1. Performthe“PressureReliefProcedure”describedearlierinthis
manual.
2. Removethetipfromtheslotonthetipguard.
3. Insertthenewtipintotheslotonthetipguard.Thearrowonthetip
handleshouldbepointingintheforwarddirectionforspraying.
Removing the Seal and Tip seal
1. Removethetipfromthetipguard.
2. Insertthetiphandlethroughthefrontofthetipguard.
3. Pushthesealandtipsealoutthroughthebackofthetipguard.
Tip Guar
Tip Seal Retainer
Identifying Tip Sizes
Toidentifytipsizes,usethefollowingformula.A“517”tipsizewillbeusedin
this example.
Therstdigitmultipliedbytworepresentsthesizeofthespraypatternwhen
spraying12”awayfromtheworksurface:
5x2=10”spraypattern
Thesecondtwodigitsrepresentthediameteroftheoriceonthetip:
17=.017”orice
NOTE: Worn spray tips will adversely aect the spray pattern
and result in reduced production, poor nish, and wasted
material. Replace worn tips immediately.
Cleanup
Maintainingacleangunisimportanttoensuretrouble-freeoperation.Flush
thegunaftereachuseandstoreinadrylocation.Donotleavethegunorany
of its parts in water or solvents.
Special cleanup instructions for use with flammable solvents:
• Alwaysushspraygunpreferablyoutsideandatleastonehose
length from spray pump.
• Ifcollectingushedsolventsinaonegallonmetalcontainer,
placeitintoanemptyvegalloncontainer,thenushsolvents.
• Areamustbefreeofammablevapors.
• Followallcleanupinstructions.
IMPORTANT: The sprayer, hose, and gun should be cleaned thoroughly
after daily use. Failure to do so permits material to cake, seriously
affecting the performance of the unit.
Always spray at minimum pressure with
the tip and tip guard removed when
using mineral spirits or any other solvent
to clean the sprayer, hose, or gun. Static
electricity buildup may result in a fire or
explosion in the presence of flammable
vapors. Hold the gun firmly against a
metal container while flushing.
Always remove the tip/tip guard, adjust the pressure to
its lowest setting, and hold the gun firmly against a metal
container while flushing.


