


FEATURES
The Aquatica Pro Digital housing serie is issued from the world’s most technologically advanced underwater housing lineage, ergonomically
designed to place all the essential camera controls under your nger tips and features the following:
A. A port locking mechanism to prevent accidental rotation of the port or extension mounted on the housing
B. A Lens Lock Release control that will activate the lens release button of camera from the outside of the housing.
C. A quick release tray, allowing fast and easy removal of camera.
D. Large ergonomic and easy to operate controls for most of the manual and computerized
camera functions.
E. The following controls can be easily manipulated underwater:
- Mechanical shutter release.
- Main-Command Dial
- Aperture and shutter speed through the Main or Quick command Dial
- Focus / Zoom control
- LCD panel illumination.
- Top LCD windows
- Metering system selector
- Auto Bracketing (BKT)
- Exposure mode (Mode)
-.Exposure Compensation
- Focus Area Selector
- ISO sensitivity
- Delete button access
- Live view access
F. A complete selection of bayonet mounted ports including an 6”, 8” and 9.25 diameter dome, two at ports and various
extension rings to preserve the image quality of your Canon Mount EF lenses.
G. A complete line of lens gears and related accessories.
PREPARATION OF THE HOUSING
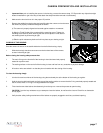
1. Attach Grip to the housing:
The housing comes with two grips for both right and left hand grips which should be installed on the sides of the housing with the
supplied screws and Allen key. Occasionally remove the grips and lubricate the screws (see Care and Maintenance: of the housing.)
Depending on which strobe system you are using, you can mount the necessary shoes or brackets onto the 1/4”-20 threaded holes on
the top of the hand grips. The AQUATICA TLC strobe arm system is recommended.
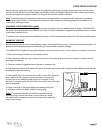
There are also three (3) 1/4”-20 threaded holes on the bottom of the housing that can be used for various mounting application trays. As
well there is another hole on front half of the housing for mounting accessories.
Mount your strobe and connect the sync cord to the housing’s strobe bulkhead. Be sure to read the
section titled “Care and Maintenance: of the O-rings.”
2. Lubricate the Main O-ring Seal:
Before use, remove the Main O-ring seal from its groove on the front half of the housing and carefully verify that the O-ring and the
O-ring groove are free from scratches or foreign material. Lubricate the O-ring with a light coat of silicone grease.
When replacing the O-ring place the entire O-ring over the O-ring groove and start by pushing the O-ring in the corners. Work your way
around the O-ring making sure the O-ring is snugly sitting in the groove.
For proper handling and maintenance of O-rings be sure to read the section titled “Care and Maintenance: of the O-rings.”
page 5