1
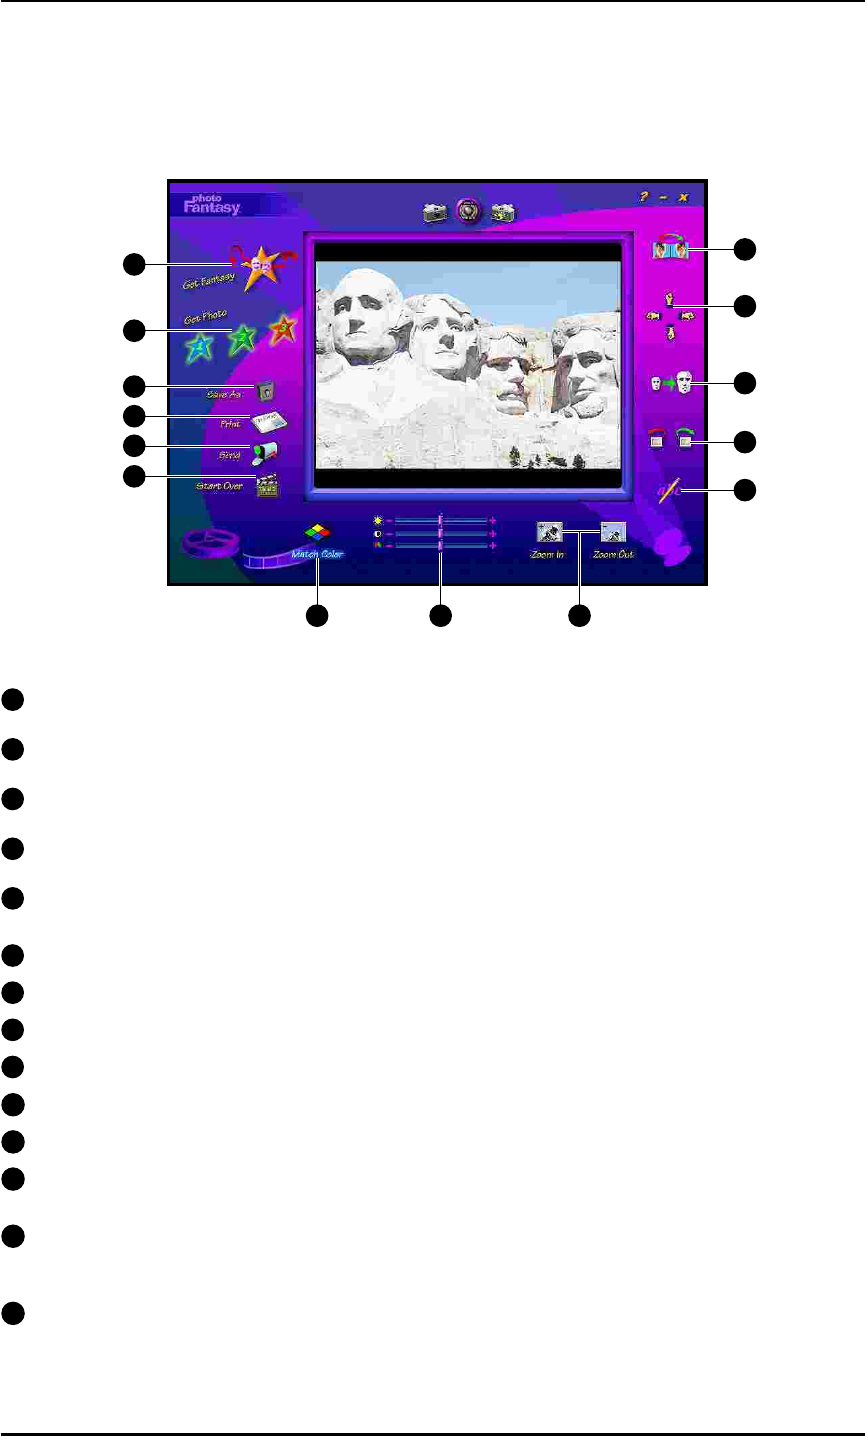
Get Fantasy Button : opens the Get Fantasy Screen, so you can select the fantasy background
for your photo fantasy. From this screen, you can also create your own fantasies.
2
Get Photo Button 1,2 or 3 : each of these buttons corresponds to a particular mask/ photo
in a fantasy background.
3
Save As Button : opens the standard Windows Save As dislog box so you can save your
finished photo fantasy under a specific path, file name and file format.
4
Print Button : opens the standard Windows Print Setup dialog box so you can select your
printer settings and begin printing your finished photo fantasy.
5
Send Button : automatically lauches your e-mail program so you can e-mail your finished
photo fantasy.
6
Start Over Button : revert the main display area.
7
Flip : flips your photo horizontally so it faces the opposite direction.
8
Move : moves the photo up, down, left and right.
9
Resize : makes the photo larger or smaller.
10
Rotate : turns your photo in a clockwise or counter-clockwise direction.
11
Add Text : opens a text box so you can add text to your photo fantasy.
12
Match Color : automatically adjusts the skin tone in your phototo better match the skin tone
in your selected fantasy background. To revert to the original color, click again.
13
Brightness : slide the bar to the right or left to adjust the brightness in your photo.
Contrast : slide the bar to the right or left to adjust the contrast in your photo.
Saturation : slide the bar to the right or left to adjust the saturation in your photo.
14
Zoom In : close-up look at the photo in your photo.
Zoom Out : returns the photo fantasy to the original view.
Digital Camera DC1500 User Guide
• Main Screen
The Main Screen contains controls that allow you to access the other program screens, as
well as to make final adjustments and enhancements to your photo fantasy.
8
• Main Screen
1
2
3
4
5
6
7
8
9
10
11
12
13
14
