


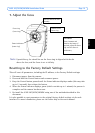
AXIS 207/207W/207MW Installation Guide Page 7
ENGLISH
ENGLISH
3. Install the hardware
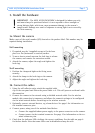
3a. Mount the camera
Make a note of the serial number (S/N) located on the product label. This number may be
required during installation.
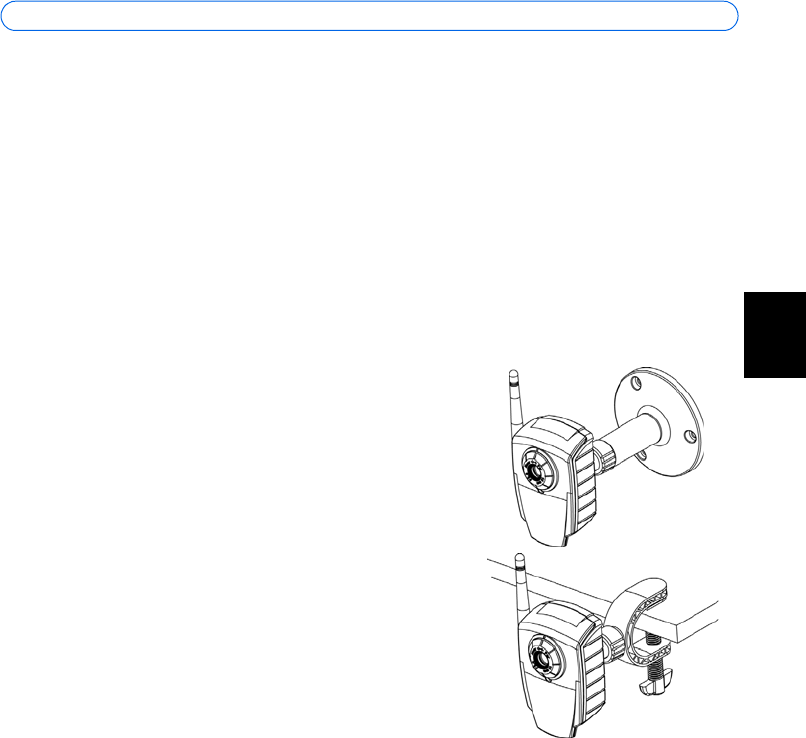
Wall mounting
1. If required, use the 3 supplied screws to fix the base
plate to a flat (horizontal or vertical) surface.
2. To use a shorter stand, unscrew the lock ring to release
the camera, and remove the extension section.
3. Attach the camera, adjust the angle and tighten the
lock ring.
Shelf mounting
1. Position the clamp and tighten the fixing screw
securely.
2. Attach the clamp to the lock ring on the camera.
3. Adjust the angle and tighten the lock ring.
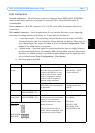
3b. Connect the cables
1. Using the self-adhesive strip, attach the supplied cable
clip to the rear panel and fasten the power cable to it. This will prevent accidental cable
disconnection.
2. Connect the camera to the network using a shielded network cable. For the wireless
models, this connection is temporary and allows the camera’s settings to be configured
via the wired network before connecting to the wireless network.
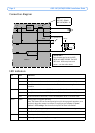
3. Optionally connect external devices, e.g. alarm devices. See page 5 for information on
the terminal connector pins.
4. Connect power, using one of the methods listed below:
• Connect the supplied indoor power supply to the power connector on the camera.
• Connect power via the terminal connector. See page 5 for information on the ter-
minal connector pins.
5. Check that the indicator LED:s indicate the correct conditions. See the table on page 6
for further details. Note that some LED:s can be disabled and may be unlit.
!
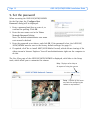
IMPORTANT! - The AXIS 207/207W/207MW is designed for indoor use only,
and must always be positioned where it is not exposed to direct sunlight or
strong halogen light, which can cause permanent damage to the camera’s
image sensor. Damage as a result of exposure to strong light is not covered by
the Axis warranty.