


Flush Mount Ceiling Kit Installing the Recessed Camera Mount | en 7
Bosch Security Systems, Inc. Mounting Guide F.01U.126.944 | 1.0 | 2009.04
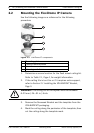
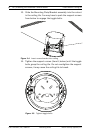
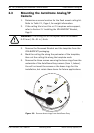
5. Loosen the three tamper-resistant screws in the FlexiDome
IP Trim Ring (the screws remain in place) using a T20 pin-
in Torx driver. Remove the Trim Ring with Dome
(Figure 2.2, item 4) by pulling it off of the base.
6. Remove the Inner Liner (Figure 2.2, item 3) by removing it
from the Camera Module/Base.
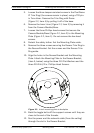
7. Loosen the three Phillips head screws that secure the
Camera Module/Base (Figure 2.2, item 2) to the Mounting
Plate (Figure 2.2, item 1). Do not remove the hex-head
screws.
8. Detach the safety tether. Set the Mounting Plate aside.
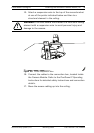
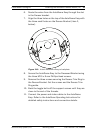
9. Remove the three screws securing the Recess Trim Ring to
the Recess Bracket. Set the screws and the Recess Trim
Ring aside.
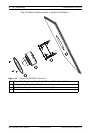
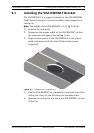
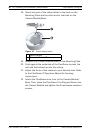
10. Align the holes in the Recess Bracket and the Mounting
Plate. Attach the Mounting Plate to the Recess Bracket,
(item 5, below) using the three #10 Flat Washers and the
three #10-24x1/2 in. Phillips Head Screws.
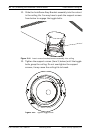
Figure 2.3 Attach mounting plate to backplate
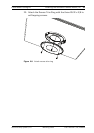
11. Back the toggle bolts off the support screws until they are
close to the end of the threads.
12. Run the power and the network cable (from the ceiling)
through the slot in the Recess Bracket.