


24 en | Installation VideoJet X40 SN
DOC | V4.0 | 2009.06 Installation and Operating Manual Bosch Security Systems
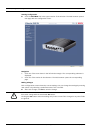
4.4 Power On/Power Off
Power Supply
The VideoJet X40 SN does not have a power switch. Power is supplied via a separate unit.
Connect the VideoJet X40 SN to the power supply unit and plug this into the mains. The unit
is now ready for use. The VideoJet X40 SN does not come supplied with a power supply unit.
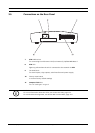
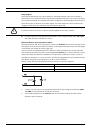
1. Plug the terminal block with the PSU cable connected to it into the orange socket on the
VideoJet X40 SN.
2. Connect the power supply unit to the mains. The VideoJet X40 SN is ready for use as
soon as the Connect LED changes from a red light, indicating the start-up procedure, to a
green light.
Provided the network connection has been correctly made, the yellow ETH LED also lights up.
A flashing ETH LED signals that data packets are being transmitted via the network.
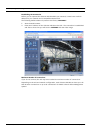
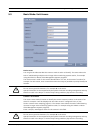
4.5 Setup Using the Configuration Manager
The Configuration Manager program can be found on the product CD contained in the scope
of delivery. This program allows you to implement and set up new video servers in the
network quickly and conveniently.
Installing the Program
1. Insert the CD into the computer's CD-ROM drive.
2. If the CD does not start automatically, open the Configuration Manager directory using
Windows Explorer and double-click Setup.exe.
3. Follow the on-screen instructions.
!
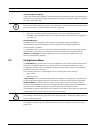
CAUTION!
Use only power supply units with UL approval and a power output according to LPS or
NEC Class 2.
Where necessary, use suitable equipment to ensure that the power supply is free from
interference such as voltage surges, spikes or voltage drops.
Do not connect the VideoJet X40 SN to the power supply until all other connections have
been made.
i
NOTICE!
Using the Configuration Manager to set all parameters in the VideoJet X40 SN is an alternative
to configuration by means of a Web browser, as described in chapter 5 of this manual.