24
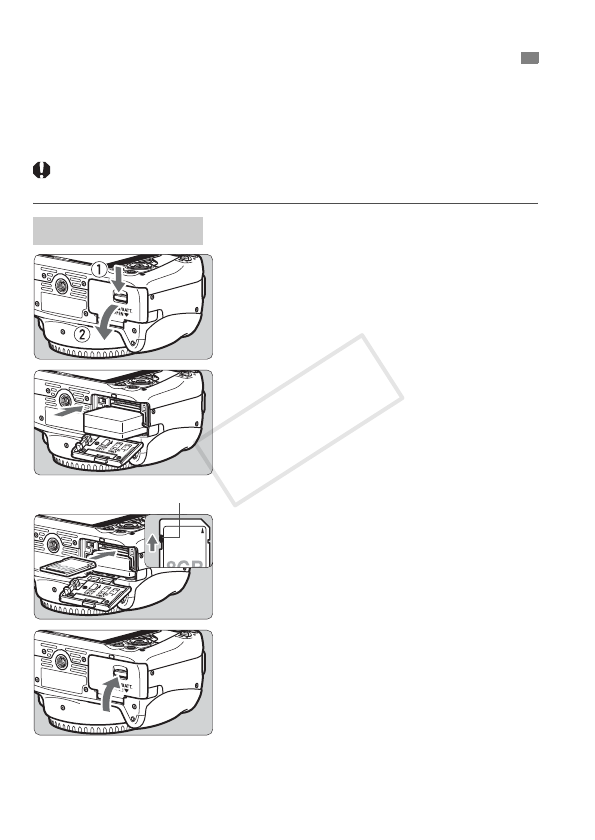
Load a fully charged Battery Pack LP-E12 into the camera. The camera
can use an SD, SDHC, or SDXC memory card (sold separately). UHS-I
Speed Class SDHC and SDXC memory cards can also be used. The
captured images are recorded onto the card.
Make sure the card’s write-protect switch is set upward to
enable writing/erasing.
1
Open the cover.
Slide the lever as shown by the
arrows and open the cover.
2
Insert the battery.
Insert the end with the battery
contacts.
Insert the battery until it locks in
place.
3
Insert the card.
As shown by the illustration, face the
card’s label side toward the back of
the camera and insert it until it clicks
in place.
4
Close the cover.
Press the cover until it snaps shut.
When you set the power switch to
<1>, the number of possible shots
(p.28) will be displayed on the LCD
monitor.
Installing and Removing the Battery and Card
Installing the Card
Write-protect switch
COPY


