


Recording Video
54
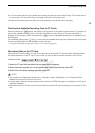
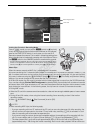
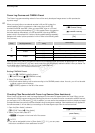
3 Select [4K], [2K] or [MXF] and then press SET.
• The system priority changes to the selected menu item. Hereafter,
each mode will be referred to in this manual as “4K mode”, “2K
mode” and “MXF mode”, respectively.
• Select [4K] or [2K] to record a 4K or 2K clip* on an external recorder.
Select [MXF] to record only an MXF clip (HD video) on a CF card.
• During 4K mode, [RAW] appears on the upper right of the screen and
the icon appears on the rear panel.
* “Clip” refers to one movie unit from the point you press the START/STOP button to
start recording until you press again to pause the recording. You can also include custom picture settings (A 114) and metadata
(A 97) with MXF clips.
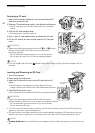
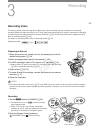
4 Press the START/STOP button to begin recording.
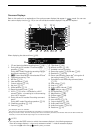
• During 4K and 2K modes:
- Recording starts and a signal is sent to an external recorder
connected to the HD/SD SDI or 3G-SDI terminals instructing it
to start recording. [ÜREC `] appears at the upper center of
the screen and the tally lamp illuminates.
- If there is a CF card in a CF card slot, the camera
simultaneously records an MXF clip on the card. In such case,
[ÜREC] appears on the upper left of the screen.
- Depending on the aspect ratio of the 4K or 2K video, you can
select the resizing method when recordings on the CF card are
output (A 65).
• During MXF mode:
- Recording starts. The tally lamp illuminates and [ÜREC]
appears on the upper center of the screen.
- If an external recorder is connected to the HD/SD SDI terminal, a signal is sent instructing it to start
recording. [ÜREC`] appears on the center right of the screen.
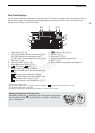
• You can use the START/STOP button on the back of the camera, the front of the camera (next to the lens
mount), or the monitor unit.
5 Press the START/STOP button to pause the recording.
• Recording stops and a signal is sent to the external recorder to pause the recording. When recording on a
CF card, a clip is recorded and the camera enters record pause mode. [STBY`] or [STBY] appears at the
top of the screen. The tally lamp will also go out.
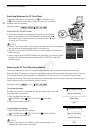
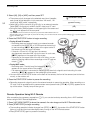
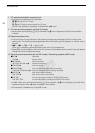
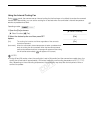
Remote Operation Using Wi-Fi Remote
After completing the necessary preparations (A 51) you can start and stop recording from a Wi-Fi-enabled
device using the Wi-Fi Remote application.
1 Press [LIVE VIEW ON/OFF] to show the camera’s live view image on the Wi-Fi Remote screen.
2 Press [START/STOP] to begin recording.
• The recording operation indicator changes from [STBY] to [ÜREC], the center of the START/STOP button
lights up in red and the time code display starts running on the Wi-Fi Remote screen.
• Press [START/STOP] again to pause the recording.
[ 4K/2K/MXF Setup]
[System Priority]
[4K]
COPY