


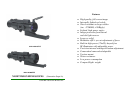
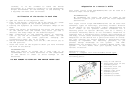

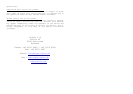

Variant II – Adapter rail with 7/8’’ Weaver prism type.
Fastening of the device is made with the help of the
following parts:
1-body of the device
2-fastening
screws
3-adapter rail with
7/8’’ Weaver prism
encompassing:
4-insert
rest
5-insert
6-clamp
7-clamp
screw.
All parts of the
alignment are supplied
by JSC Dedal-NV.
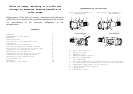
The following types of rails are recommended:
WP135-64 - for the NVD-NORS210 with
standard objective 64mm,
WP150-100 - for the NVD-NORS220 with
standard objective 100mm or for the
NVD-NORS210 with objective 64mm + 2x
Magnification Lens.
WP90-64 - for the device with objective
64mm or with objective 100mm (NORS210 or
NVD-NORS220).
NOTE.
The mounts WP135-64, WP150-100 move the device back,
which is necessary for some rifles for comfortable
supervision.
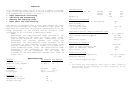
Adaptation of the device is performed in consistency with
the following rules:
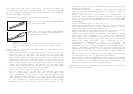
- Check the elevation of the fastening screws (2), pulling
the rail (3) to the body of the device (1) above the
upper surface of the rail. The height of elevation must
not exceed 3.0mm and must not be less than 2.5mm. It is
especially important when the body of the device has a
blind aperture with a thread (front hole for the device
with a 64 mm objective). The elevation should not exceed
3.5mm for through holes and should not be less than
2.5mm. This requirement can be met by cutting axle
length of the screws from the side of the thread;
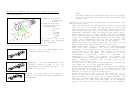
- Remove fat from the surface (A)of the rail and from the
body of device at the place that will be glued;
- Prepare the glue (glue is needed, for example, epoxy
with the tear strength not less than 200kg/cm
2
)
according to its preparation instruction, and put it on
the surface (A) of the plate. The surface of the screws
should not have any glue. This condition is of a
considerable importance, since it provides an
opportunity to repair the device and remove the
alignment plate for further adaptation to another rifle;
- Apply a hermetic substance (of silicone type) on the
thread of the screws (2);
- Fix the rail to the body of the scope with the help of
the screws (2) cut at the required length;
- Remove glue surpluses appeared in the place of alignment
of the rail with the body with a dry napkin and let the
glue solidify in accordance with its instruction (for
example, 24 hours in case of epoxy glue);
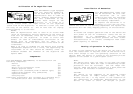
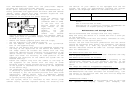
- Place the scope on the rail of the rifle in such a
position when your eye coincides with the edge of the
Eyepiece Guard or in case of a large caliber (for
example, .375 H&H Mag) your eye should be situated at
the distance of 2-5cm from the edge of the Eyepiece
Guard. The device should be located in the position