


53
OTHER RECORDING FUNCTIONS
4.
After confirming that the Auto Focus operation
is complete (operation indicator is green),
press the shutter button all the way down to
record the image.
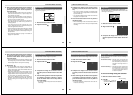
• The right edge of the previous image you recorded re-
mains on the monitor screen, so you can align it cor-
rectly with the next image.
• From the second image onwards, aim the camera fur-
ther to the right and overlap the next image with the
previous one on the monitor screen.
• Up to nine images can be grouped into a panorama.
Press MENU when you want to stop a panorama re-
cording operation.
• If you want to link more than 9 images into a pan-
orama, upload the images to a computer and use your
computer application to link them.
• Aperture setting and white balance settings are locked
when you record the first image of a panorama, and
these settings are applied to all subsequent images in
that panorama.
• See “Panorama Playback” on page 71 for details on
playing back panoramas.
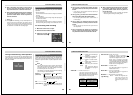
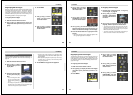
Sports Mode
The sports mode makes it possible to capture sharp record-
ings of moving objects.
1.
Slide the Function Switch to REC.
2.
Align the dial with .
54
OTHER RECORDING FUNCTIONS
3.
Compose the image on the monitor screen,
and then press the shutter button about half
way.
• Auto Focus continues to update in accordance with
the movement of the subject while the shutter button
is pressed half way.
• The operation indicator and the Auto Focus frame do
not appear in the sports mode.
4.
Press the shutter button all the way down to
record the image.
• When available light is dim, the shutter slows down to
the same speed used for normal (non-Sports Mode)
recording.
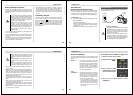
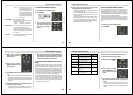
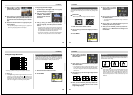
Night Mode
The Night Mode is for recording images in dark areas.
• Using the Night Mode in combination with the flash records
the image in slow synchro.
1.
Slide the Function Switch to REC.
2.
Align the dial with .
3.
Compose the image on the monitor screen,
and then press the shutter button about half
way.
55
OTHER RECORDING FUNCTIONS
4.
After confirming that the Auto Focus operation
is complete (operation indicator is green),
press the shutter button all the way down to
record the image.
• When recording images of people on a twilight or night
time background, you can use the flash in combination
with the Night Mode for slow synchro recording.
IMPORTANT!
• The shutter speed is quite slow in the Night Mode, so
you should be sure to use a tripod to hold the camera
steady. Note that the camera shake indicator does not
appear in the Night Mode.
• Slow shutter speed also causes slow monitor screen
refresh. Because of this, the image recorded may be
slightly different from the image that was on the moni-
tor screen when you pressed the shutter button.
• Auto Focus is difficult in the dark. If you experience
problems, use manual focusing (page 49). There may
be some blurring of the image if the subject is fast
moving.
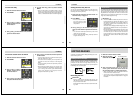
Sepia Recording
The Sepia Mode records images in sepia tone.
1.
Slide the Function Switch to REC.
2.
Align the dial with .
3.
Compose the image on the monitor screen,
and then press the shutter button about half
way.
4.
After confirming that the Auto Focus operation
is complete (operation indicator is green),
press the shutter button all the way down to
record the image.
• An image recorded in sepia cannot be converted to a
color image.
56
OTHER RECORDING FUNCTIONS
Monochrome Recording
The Monochrome Mode records images in black and white.
1.
Slide the Function Switch to REC.
2.
Align the dial with .
3.
Compose the image on the monitor screen,
and then press the shutter button about half
way.
4.
After confirming that the Auto Focus operation
is complete (operation indicator is green),
press the shutter button all the way down to
record the image.
• An image recorded in monochrome cannot be con-
verted to a color image.
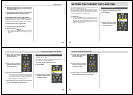
Using the Self-timer
You can use the self-timer for either of the two following re-
cording operations.
10-second recording.... Records about 10 seconds after
the shutter button is pressed. Use
this method when you want to be
included in the image that is re-
corded.
2-second recording ...... Records about two seconds after
the shutter button is pressed. Use
this method to avoid camera
movement caused when the shut-
ter button is pressed.
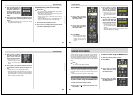
To record an image using the self-timer
1.
Slide the Function Switch to REC.
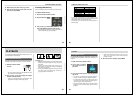
2.
Press .
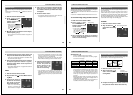
• Each press of cycles the
self-timer in the sequence:
10
2 Off.
Self-timer setting