4-5
Cisco Video Surveillance 7030 IP Camera Installation Guide
OL-28692-01
Chapter 4 Camera Management
Viewing Live Video
Viewing Live Video
After you install and set up the Cisco Video Surveillance IP Camera, you can connect to the IP camera
through Internet Explorer and access the Camera Video & Control window to view live video.
The Camera Video & Control window also provides for controlling the video display, configuring preset
positions, and controlling certain IP camera functions. Available controls depend on the privilege level
of the user.
To view live video, log in to the IP camera, then click View Video in the IP camera Main window menu
bar. The Camera Video & Control window appears. This window displays live video from the camera
and lets you control a variety of camera and display functions.
The controls that you see in the Camera Video & Control window depend on your IP camera privilege
level and the configurations settings for the IP camera. Users with the Administrator privilege can access
all controls. Users with the Viewer privilege do not have access to the following controls:
• Video image controls
• Motion detection controls
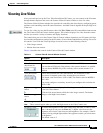
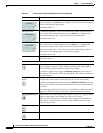
Table 4-4 describes the controls in the Camera Video & Control window.
Ta b l e 4-4 Camera Video & Control Window Controls
Control Description
Video controls
Video Codec
drop-down list
Choose the codec for video transmission (H.264 or MJPEG).
You can choose H.264 only if the primary video stream (channel 1) is enabled.
You can choose MJPEG only if the secondary video stream (channel 2) is
enabled.
Video Resolution
drop-down list
Choose the resolution for video transmission. The resolutions in this
drop-down list depend on the video standard that you selected.
The default value for H.264 is 1920 x 1080. The default value for MJPEG is
704 x 480.
You cannot configure a secondary stream if you configure this resolution for
1920 x 1080.
Right Arrow toggle
button
Click the Right Arrow to display the video image controls. The button changes
to the Left Arrow button.
Click the Left Arrow button to hide the video image controls. The button
changes to the Right Arrow button.
Left Arrow toggle
button
Video image controls
Note These controls appear when you click the Right Arrow in the Video Control area.
Brightness slider To control the brightness of the video image, drag the slider, or enter a value
from 1 through 10 and press the Enter key. A higher value increases the
brightness and a lower value decreases the brightness. For example, if the IP
camera is facing a bright light and the video appears too dark, you can increase
the brightness.
The default value is 5.


