


Installing Creative WebCam NX Pro 1-4
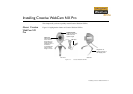
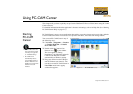
2. Check the image in the Video preview pane of the Creative WebCam NX Pro Camera
Configuration dialog box. If it flickers or displays a series of dark bands, click the Cancel Flicker
button.
3. Click the Finish button, and then restart your computer if you are prompted to do so.
For Windows 2000 only
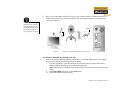
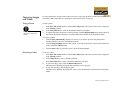
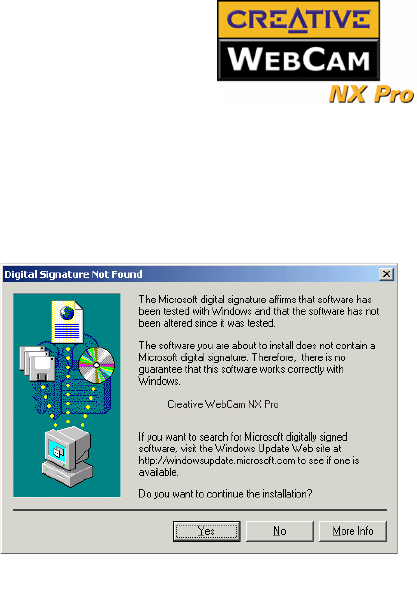
1. When a Digital Signature Not Found dialog
box appears, telling you that Creative
WebCam NX Pro has been detected, click the
Yes button.
2. Check the image in the Video preview pane of
the Creative WebCam NX Pro Camera
Configuration dialog box. If it flickers or
displays a series of dark bands, click the
Cancel Flicker button.
3. Click the Finish button, and then restart your
computer if you are prompted to do so.
For Windows XP only
After connecting your camera, Windows
automatically detects the device.
1. When the Found New Hardware Wizard
dialog box appears, select Install the software automatically (Recommended), and then click the
Next button.
Figure 1-3: Digital Signature Not Found
dialog box.