


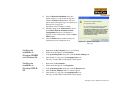


Installing Creative WebCam Notebook 1-3
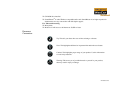
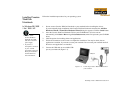
6. Clip Creative WebCam Notebook on top of your
notebook screen (Figure 1-3).
Follow the steps below that are for your operating
system.
For Windows 98/98SE and Windows Me only
After connecting your camera, Windows automatically detects
the device.
i. If you are prompted to insert the Windows 98 CD,
replace the Creative WebCam Notebook CD with
the appropriate CD.
Note: Windows 98 is available in various editions.
Be sure to use the correct edition for your system.
ii. In the Insert Disk dialog box, click the OK button.
iii. Follow the instructions on the screen.
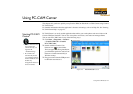
7. Check the image in the Video preview pane of the
Creative WebCam Notebook Camera Configuration
dialog box.
If it flickers or displays a series of dark bands, click the Cancel Flicker button.
8. Click the Finish button, and then restart your notebook if you are prompted to do so.
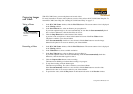
Figure 1-3: Clipping Creative WebCam
Notebook to your notebook
screen