29
Taking Pictures
You can use this camera to take still images. The recorded image file format is
JPEG. The maximum recordable number of images depends upon the free space
of the internal memory or SD card. Moreover, the image resolution and quality will
also affect the number of recordable images. The higher image resolution and
quality, the more memory space that is needed.
To take a picture, perform the following steps:
Turn on the camera and set the date and time (refer to page 17).
2. Toggle the Mode Dial to the Picture Mode and you will see the Picture Mode
icon displayed on the LCD screen. Set the image resolution and quality
on demand (refer to page 22 or page 31).
3. Toggle the Macro switch to appropriate mode (refer to page 29).
4. Frame the picture in the LCD screen, and press the Shutter button
This camera is designed for 2-step shutter function. Press the Shutter button
down halfway and the camera adjusts the focus automatically (the focus
adjustment frame is shown) Press the Shutter button the rest of the way
down, and a
symbol will appear on the LCD screen indicating the camera
is recording the image.
5. Press the top of the 4-way scroll button to zoom in or the bottom to
zoom out
on subjects. The maximum zoom is 4X.
6. You can also use the Self-timer button to take a picture on a delay. (refer to
page 29).
7. Use the Flash when the light is insufficient (refer to page 30).
8. Use the Playback Mode to review the recorded images (refer to page 37).
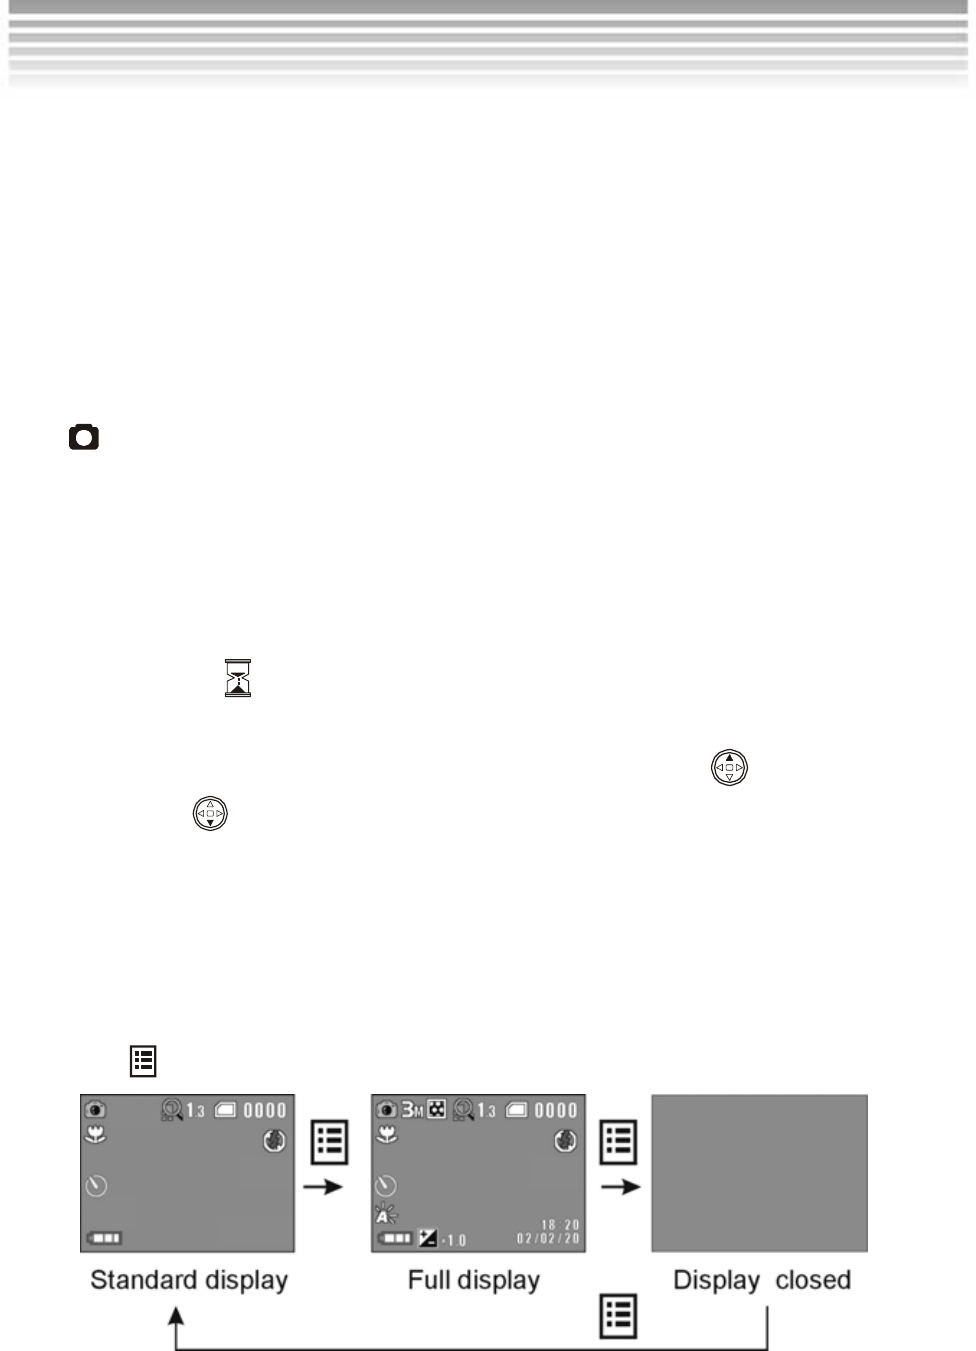
LCD Display
Press the button to toggle among display modes of the LCD screen.
Picture mode (con.)
