


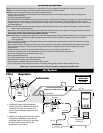
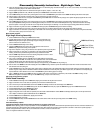
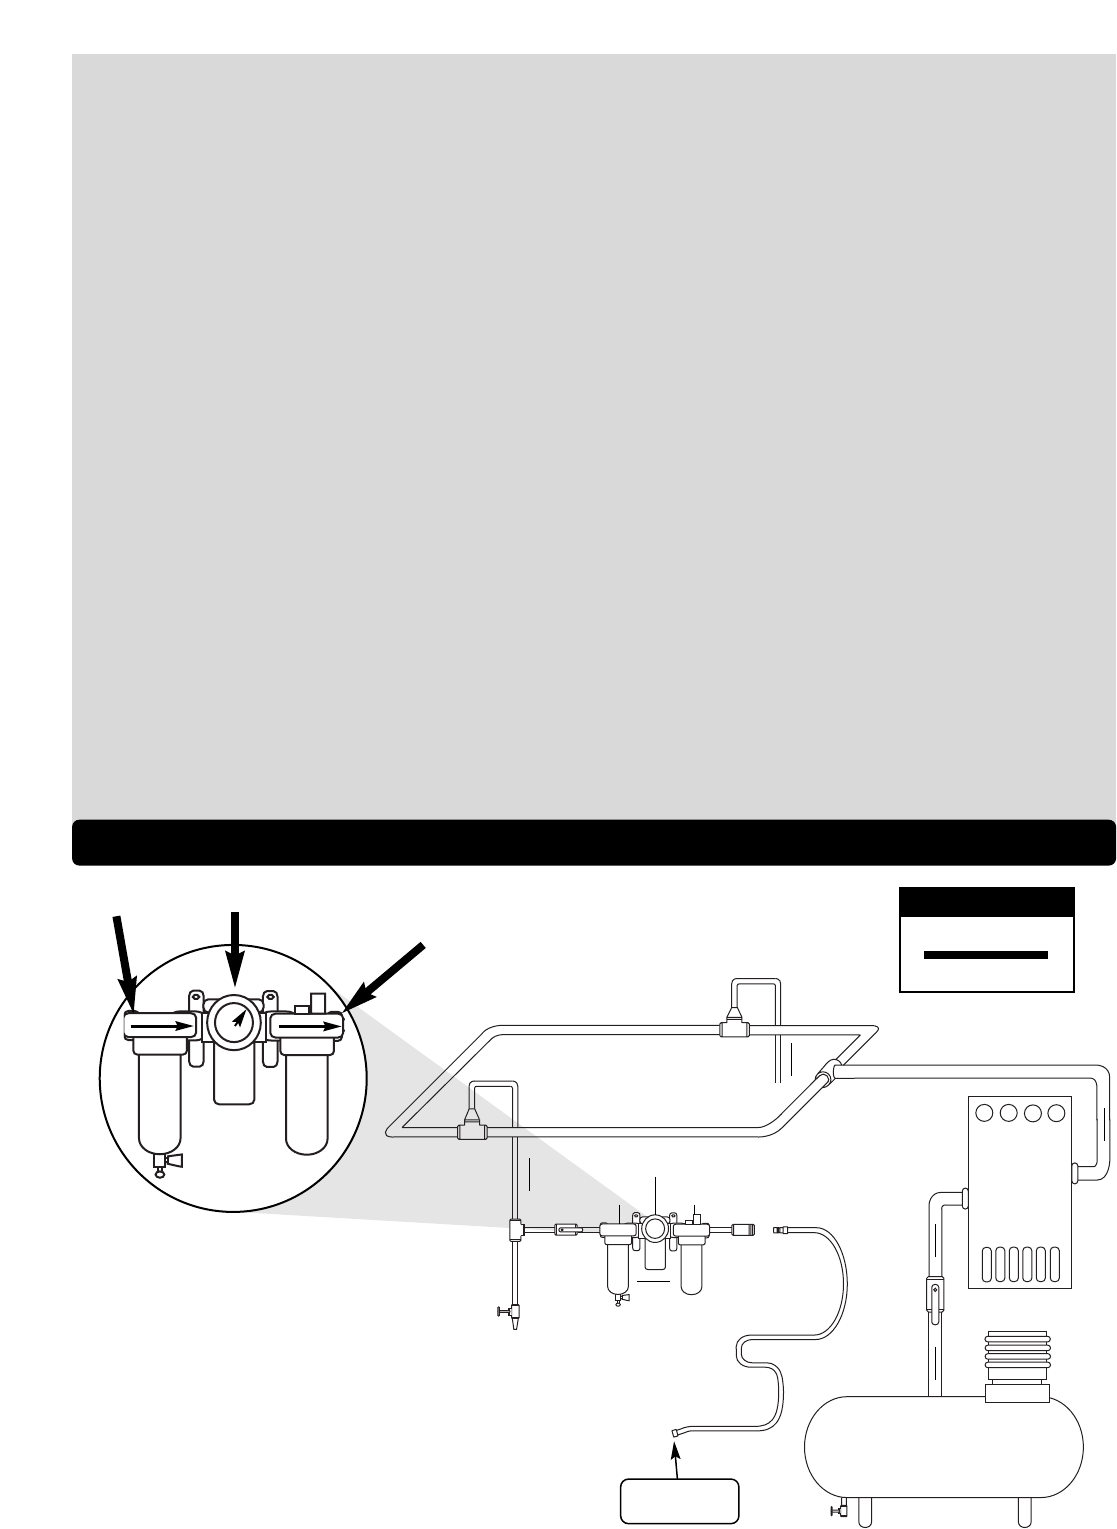
To Tool Station
Closed Loop Pipe System
(Sloped in the direction of air flow)
Ball
Valve
Ball
Valve
Filter
Regulator
Lubricator
Air Flow
Drain
Valve
Drain
Valve
Air Tool
Air Compressor
and Receiver
Drain Valve
Air Hose
90 PSIG MAX
(6.2 Bar)
Air Flow
Refrigerated
Air Dryer
Filter Regulator
Lubricator
90 PSIG
(6.2 Bar)
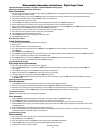
OPERATING INSTRUCTIONS
Warning: Always wear eye protection. Operator of tool is responsible for following: accepted eye, face, respiratory, hearing and body protection.
Caution: Hand, wrist and arm injury may result from repetitive work, motion and overexposure to vibration.
Caution: Be sure that any loose clothing, hair and all jewelry is properly restrained.
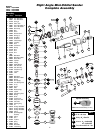
• Install air fitting into inlet bushing of tool. Important: Secure inlet bushing of tool with a wrench before attempting to install the air fitting to avoid
damaging valve body housing.
• Connect air source, depress throttle lever.
• BEFORE MOUNTING AN ACCESSORY, after all tool repairs and whenever a Right Angle Mini-Orbital Sander is issued for use, check tool OPM (speed)
with tachometer with air pressure set at 90 PSIG while the tool is running. This tool is an orbital tool, checking the OPM requires either a strobe or
magnetic tachometer. If tool is operating at a higher speed than the RPM marked on the tool housing, or operating improperly, the tool must be serviced
and corrected before use.
Caution:Tool RPM / OPM must never exceed abrasive/accessory RPM / OPM rating. Check accessory manufacturer for details on maximum operating
speed or special mounting instructions.
• With power source connected at the air tool relieve hose of air pressure and disconnect tool from air supply when changing recommended accessories.
• Connect air tool to power source. Be careful NOT to depress throttle lever in the process.
Do not expose air tool to inlet pressure above 90 PSIG or (6.2 Bars).
Caution: After installing the accessory, before testing or use and/or after reassembling tool, the Right Angle Mini-Orbital Sander must be started at a reduced
speed to check for good balance. Gradually increase tool speed. DO NOT USE if tool vibration is excessive. Correct cause, and retest to
insure safe operation.
• Use only appropriately sized abrasive sanding discs properly secured to the backing pad provided with the air sander. Ensure that self-fixing sanding
discs are mounted concentrically.
• Make sure that work area is uncluttered, and visitors are at a safe range from the tools and debris. Potentially explosive atmospheres can be caused
by dust and fumes resulting from sanding or grinding. Always use dust extraction or suppression systems which are suitable for the material
being processed.
• Proceed with caution in unfamiliar surroundings. Hidden hazards may exist, such as electricity or other utility lines.
• Air tools are not intended for use in explosive atmospheres and are not insulated for contact with electric power sources.
• Use a vise or clamping device to hold work piece firmly in place.
• Work may generate hazardous dust.
• Do not apply excessive force on tool or apply “rough” treatment to it.
• Always work with a firm footing, posture and proper lighting.
• Ensure that sparks and debris resulting from work do not create a hazard.
• This tool is front exhaust. Exhaust may contain lubricants, vane material, bearing grease, and other materials flushed thru the tool.
Report to your supervisor any condition of the tool, accessories, or operation you consider unsafe.
Air System
1 DROP/MIN.
20 SCFM
LUBRICATOR SETTING
•
Dynabrade Air Power Tools are designed to
operate at 90 PSIG (6.2 Bar/620 kPa) maximum
air pressure at the tool inlet, when the tool is
running. Use recommended regulator to control
air pressure.
•
Ideally the air supply should be free from moisture.
Incorporating a refrigerated air dryer after the
compressor and drain valves at each tool station
(as shown) further reduces moisture from
condensation in the air supply.
➤
➤
➤
➤
➤
➤