


41
Connections
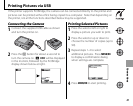
Printing Pictures via USB
If the printer supports PictBridge, the camera can be connected directly to the printer and
pictures can be printed without first being copied to a computer. Note that depending on
the printer, not all the functions described below may be supported.
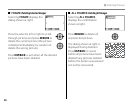
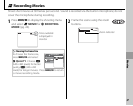
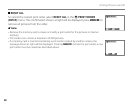
Connecting the Camera
Connecting the Camera
1
Connect the supplied USB cable as shown
and turn the printer on.
2
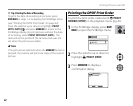
Press the D button for about a second to
turn the camera on. w USB will be displayed
in the monitor, followed by the PictBridge
display shown below at right.
USB
00
OK SET
FRAME
PICTBRIDGE
TOTAL:
00000
SHEETS
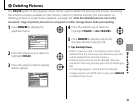
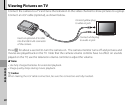
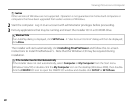
Printing Selected Pictures
Printing Selected Pictures
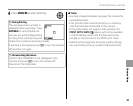
1
Press the selector left or right to
display a picture you wish to print.
2
Press the selector up or down to
choose the number of copies (up to
99).
3
Repeat steps 1–2 to select
additional pictures. Press MENU/OK
to display a confirmation dialog
when settings are complete.
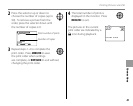
PRINT THESE FRAMES
TOTAL:
9
SHEETS
YES CANCEL
4
Press MENU/OK to start printing.