


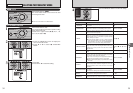

40 41
Advanced Features
3
This is useful when checking the shot composition for dimly lit scenes (Slow synchro shots, etc.).
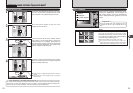
1
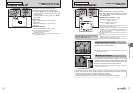
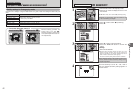
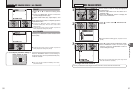
Set the Mode switch to Photography mode.
Press the “
fi (a)” button.
“” appears on the LCD monitor and the subject is
displayed brightly.
To cancel increased brightness:
Press the “fi (a)” button again.
This function is automatically canceled after each
shot.
●
!
When this function is active, it will increase the amount of
speckling in images on the LCD monitor. This is normal and
does not affect the photographed image.
●
!
This function is purely for checking the composition of your
shot. It does not increase the brightness of the image.
●
!
Even if you increase the brightness in low-light conditions,
you cannot check the subject.
●
!
The color tones may vary depending on the subjects.
2
UPUP
1010
NN
N
F
N
QUALITYQUALITY
:
AUTOAUTO
STDSTD
:
:
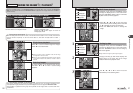
1
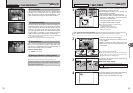
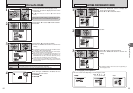
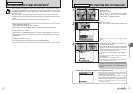
1Set the Mode switch to Photography mode.
2Press the “p” button to display the menu on the
LCD monitor.
1Press “a” or “b” to select “
˘” QUALITY.
2Press “c”.
The quality setting is retained even when the
camera is off or the mode setting is changed.
2
01 02
01 02
AUTOAUTO
STDSTD
:
:
F
N
N
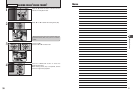
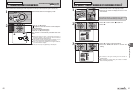
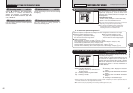
2816x2112: 10
FRAMESFRAMES
:
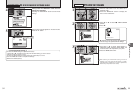
1Press “a” or “b” to change the setting.
2Press the “MENU/OK” button to confirm the
setting.
●
!
The numbers to the right of setting show the number of
available frames.
●
!
When changing the quality setting, the number of available
frames also changes (➡P.23).
3
01 02
˘ QUALITY MODE
(
NUMBER OF RECORDED PIXELS
)
pPHOTO MODE PHOTOGRAPHY
Continued
fi
INCREASING MONITOR BRIGHTNESS
PHOTOGRAPHY FUNCTIONS
Available Photography modes:
B and ?