13
Getting Ready
1
SETTING THE DATE AND TIME
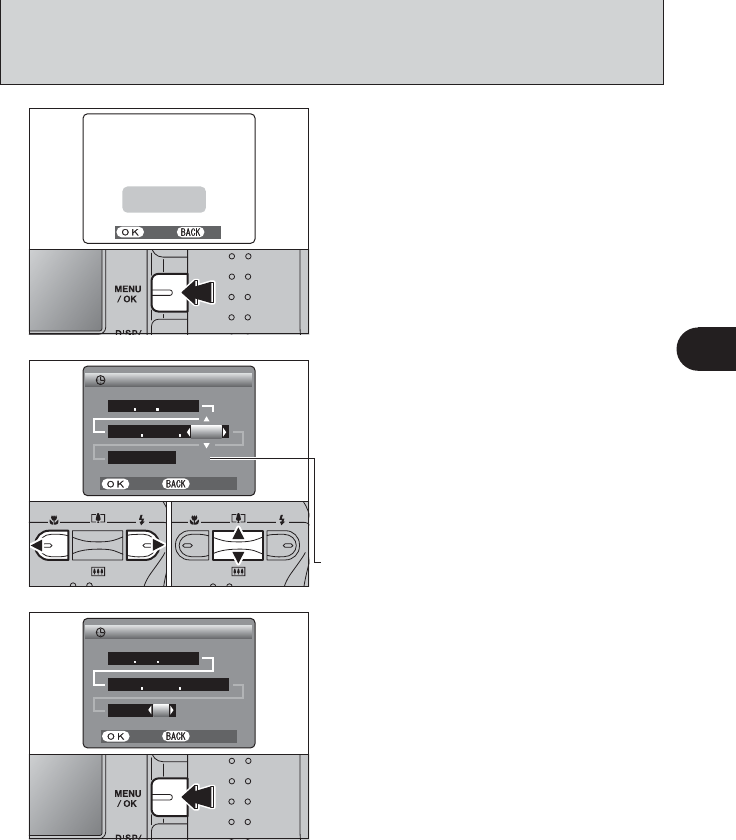
After purchasing the camera, first time when you
turn camera on, the date and time are cleared.
Press the “MENU/OK” button to set the date and
time.
●
!
To set the date and time later, press the “DISP/BACK” button.
●
!
If you do not set the date and time, this message will appear
each time you turn the camera on.
1
1Press “d” or “c” to select Year, Month, Day,
Hour or Minute.
2Press “a” or “b” to correct the setting.
●
!
Holding down “a” or “b” changes the numbers continuously.
●
!
When the time displayed passes “12:00”, the AM/PM setting
changes.
Once you have set the date and time, press the
“MENU/OK” button. Pressing the “MENU/OK”
button changes the camera to Photography or
Playback mode.
●
!
At the time of purchase and after you leave the camera for a
long period with the batteries removed, settings such as the
date and time are cleared. Once the AC power adapter has
been connected or the batteries have been loaded for 30
minutes or more, the camera settings will be retained for
roughly 3 hours even when the camera has no power
(batteries removed and AC power adapter disconnected).
2
3
01
02


