


84 85
Advanced Features
3
CANCELCANCELYESYES
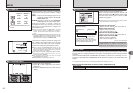
TRIMMINGTRIMMING
●
!
Press the “DISP/BACK” button to return to single-frame
playback.
5
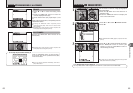
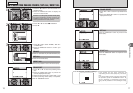
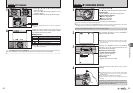
1Press “a”, “b”, “d” or “c” to display another
part of the image.
The current displayed image appears on the
navigation screen.
2Press the “MENU/OK” button to trim the image.
01 02
Navigation screen
2
3
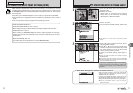
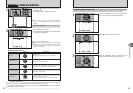
Printing at up to 6R (15.2 × 20.3 cm) / A5 size
Sample uses
Printing at up to 4R (10.2 × 15.2 cm) / A6 size
`
To use for e-mail or web site
÷
Printing at up to 10R (25.4 × 30.5 cm) / A4 size
REC OKREC OK?
RECREC
CANCELCANCEL
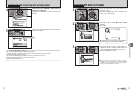
6
Check the saved image size and press the
“MENU/OK” button. The trimmed image is added
as a separate file in the final frame.
■ Image sizes
¯ TRIMMING
PLAYBACK MENU
●
!
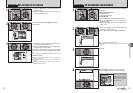
When “„” quality setting is selected, the image is trimmed to
normal size (4:3 aspect ratio).
◆
Images that can be trimmed
◆
You may not be able to trim images that were shot with a camera other than FinePix E900.
3
13
ss
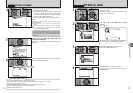
STANDBYSTANDBY
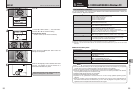
Zoom bar
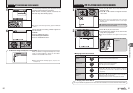
Press the “T” or “W” button to zoom in or out before
recording. You must zoom beforehand as you
cannot zoom during recording.
h Optical zoom focal length
(35 mm camera equivalent)
Approx. 32 mm to 128 mm
Max. zoom scale: 4×
h Focal range
Approx. 60 cm (2.0 ft.) to infinity
13
ss
STANDBYSTANDBY
●
!
Because sound is recorded concurrently with the images,
make sure that you do not cover the microphone with a
finger, etc. (➡P.8).
2
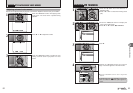
The available recording time and “STANDBY”
appear on the LCD monitor.
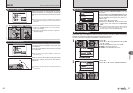
r RECORDING MOVIES
MOVIE MODE
1
Set the Mode dial to “r”.
Use “r” Movie mode to record movies with sound.
h Specifications
Motion JPEG (➡P.128) with monaural sound
h Quality selection method
% (640 × 480 pixels)
$ (320 × 240 pixels)
h Frame rate (➡P.128)
30 frames per second (fixed)
●
!
See P.87 for information on changing the quality mode.
●
!
Because a movie is recorded onto the xD-Picture Card as it is saved, it cannot be recorded correctly if the camera
suddenly loses power (if you open the battery cover or disconnect the AC power adapter).
It may not be possible to playback your movies on other cameras.
Continued
4
Press the shutter button down fully to start
recording.
●
!
The brightness and color of the LCD monitor shown during
movie recording may differ from those shown before
recording begins.
●
!
There is no need to hold down the shutter button.
●
!
Camera operation noises may be recorded during movie
shooting.
Pressing the shutter button down fully fixes the
focus, however the exposure and white balance are
adjusted to the scene being shot.