


Page 6SKU 95153
For technical questions, please call 1-800-444-3353
INSTALLATION
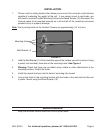
Chose a wall or ceiling location that allows you to mount the unit onto a solid surface 1.
capable of sustaining the weight of the unit. If you cannot mount to wall studs, you
will need to use the Dry Wall Mounting Anchors and Wood Screws (10). Be aware, the
Camera needs to be mounted securely so it will not fall off the mounting and cause
personal injury or property damage.
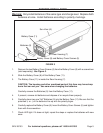
Note: The mounting holes on the Outdoor Camera are approximately 1/4” or 6 mm.
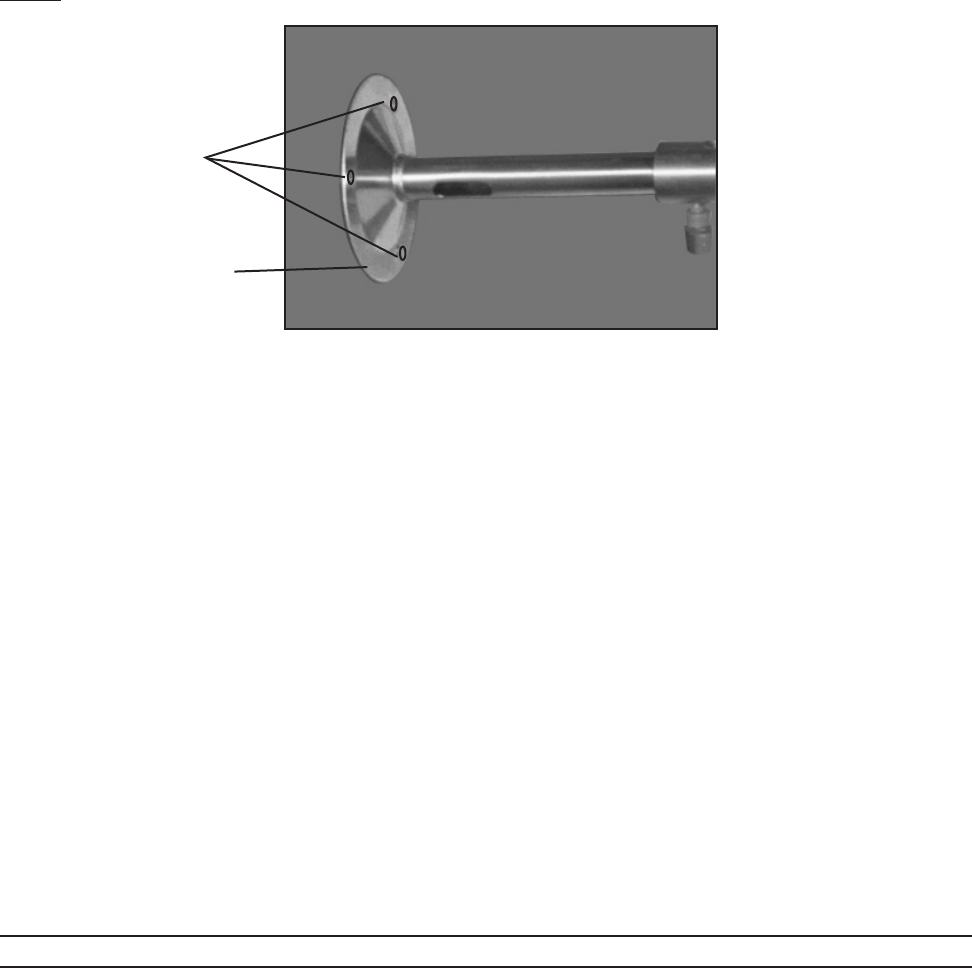
Mounting Holes
Wall Bracket (1)
FIGURE 4
2. Hold the Wall Bracket (1) of the assembly against the surface you wish to mount. Using
a pencil (not included), draw dots of the mounting holes. See Figure 4.
Warning:3. Check that there are no hidden wires, cables or other obstructions in the
mounting location. Predrill the holes.
Install the drywall anchors into the holes if mounting into drywall.4.
Line up the holes in the mounting bracket with the holes in the wall and hold the unit 5.
in place. Mount using the Wood Screws (10).
MAINTENANCE
Keep the Imitation camera clean and free of spider webs.