39
Set the date and time as shown below.
1
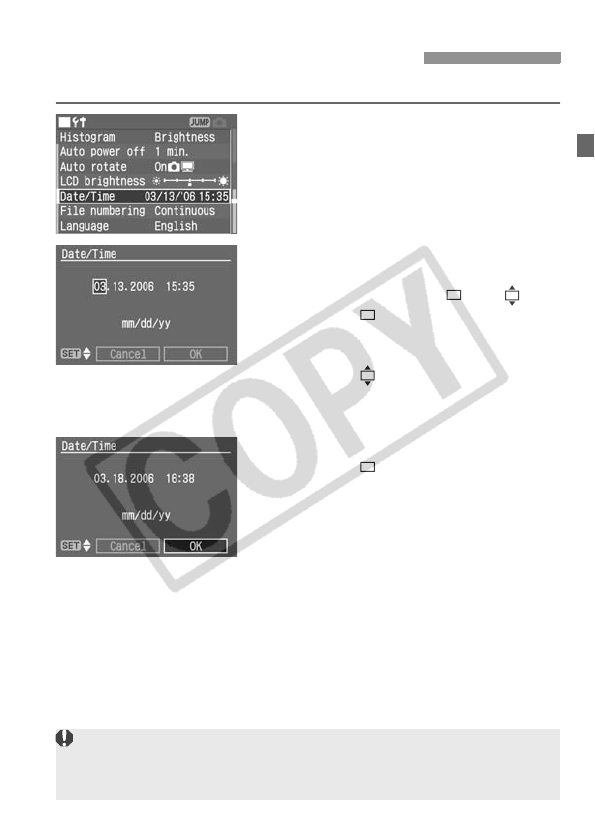
Select [Date/Time].
Turn the <5> dial to select [c Date/
Time], then press <0>.
X The date/time screen will appear.
2
Set the date and time.
Pressing the <0> button toggles the
orange box between and .
With the box displayed, turn the
<5> dial to select the date or time to
be corrected, then press <0>.
With the box displayed, turn the
<5> dial to select the correct
numeral, then press <0>.
3
Confirm the setting.
With the box displayed, turn the
<5> dial to select [OK], then press
<0>.
X The date/time will be set and the
menu will reappear. The minute that
was set will then start from 0 sec.
3 Setting the Date and Time
Each captured image is recorded with the date and time it was taken. If the
date and time are not properly set, the wrong date/time will be recorded.
Make sure you set the date and time correctly.


