


10
BASIC FEATURES
4) To cancel the Manual Focus, press FOCUS
4
. “ ”
{
disappears and Auto Focus is
applied.
• When the focus level cannot be adjusted any
farther or closer, “ ” or “ ” will blink.
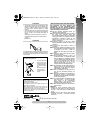
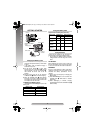
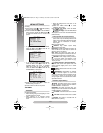
To produce the zoom in/out effect. Digital circuitry
extends the maximum magnification offered by
optical zoom. This system is called Digital Zoom.
• Slide the Power Zoom Lever
3
towards “T” to
zoom in, or “W” to zoom out.
• The further you slide the Power Zoom Lever
3
, the quicker the zoom action.
• Focusing may become unstable during
Zooming. In this case, set the zoom while in
Record–Standby, lock the focus by using the
manual focus, then zoom in or out in Record
mode.
• The zoom level indicator
<
-a moves during
zoom. Once the zoom level indicator
<
-a
reaches the top, all magnification from that
point is through digital processing.
• When using Digital Zoom, the quality of image
may suffer. To deactivate Digital Zoom, set
“D.ZOOM” (੬pg. 13) to “OFF” in CAMERA
MENU.
To check the end of the last recording.
1) Make sure the camcorder is in Record–
Standby mode.
2) Press 1
)
and release quickly.
Tape is rewound for approx. 1 second and
played back automatically, then pauses in
Record–Standby mode for the next shot.
• Distortion may occur at the start of playback.
This is normal.
To re-record certain segments.
1) Make sure the camcorder is in Record–
Standby mode.
2) Press and hold either RETAKE ¡
%
or 1
)
to reach the start point for new recording.
3) Press the Recording Start/Stop Button
!
to
start recording.
• Noise bars appear and pictures may become
monochrome or darken during Retake. This is
normal.
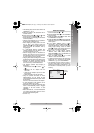
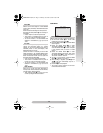
Eliminates noise bars that appear on-screen
during playback. To activate Manual Tracking:
1) Press the TRACKING Wheel
1
for approx. 2
seconds. “MT”
5
appears.
2) Rotate the TRACKING Wheel
1
so that the
noise bars disappear.
• To return to Auto Tracking, press the
TRACKING Wheel
1
for approx. 2 seconds or
set the Power Switch
#
to “OFF” and then
“PLAY” again. “AT”
5
blinks. When Auto
Tracking finishes, the indication disappears.
• When noise bars appear during playback, the
camcorder enters the Auto Tracking mode and
“AT”
5
appears.
• Manual Tracking may not work with tapes
recorded on other VCRs or camcorders.
Removes jitter from fluctuating video signals to
deliver a stable picture even with old tapes.
To activate/release the TBC mode, press TBC
4
during playback for more than 1 second. “TBC”
1
is displayed.
• The “TBC” indicator
1
turns green (grey with
a camcorder equipped with a black/white
viewfinder) while TBC is working, and white
while TBC is not operative.
• TBC does not work during Still Playback and
Shuttle Search (੬pg. 9).
• It may take a few seconds before TBC actually
starts working.
• The picture may be distorted if the TBC mode
is activated or deactivated at the edit-in/-out
points or when normal playback resumes after
Still Playback or Shuttle Search (੬pg. 9).
• If the playback picture is distorted when TBC is
set to on, turn off TBC.
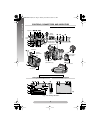
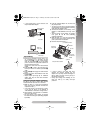
1) Make sure all units are turned off.
2) Connect the camcorder to a TV or VCR. If
using both TV and VCR, connect the VCR
output to the TV input.
3) Turn on all units. Set the VCR to its AUX input
mode, and set the TV to its VIDEO mode.
• Use the AC Adapter as the power supply.
• Be sure to lower the TV volume to its minimum
to avoid a sudden burst of sound when the
camcorder is turned on.
• If you have a TV or speakers that are not
specially shielded, do not place the speakers
adjacent to the TV as interference will occur in
the camcorder playback picture.
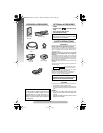
Zooming
Quick Review
Retake
Tracking
TBC (Time Base Corrector)
Connections To A TV/VCR
GR-FXM41EN(EK).fm Page 10 Monday, November 8, 2004 10:03 AM