


28
RECORDING
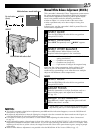
Advanced Features (cont.)
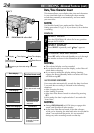
Self-Timer
You can set the delay between pressing RECORDING
START/STOP and the actual start of recording. If you
secure the camcorder, you (or whomever is operating the
camcorder) can enter the scene before recording starts.
NOTE:
Make sure the camcorder is in the Record-Standby mode
before performing the following steps.
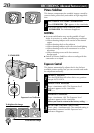
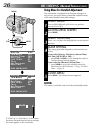
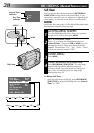
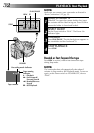
ACCESS MENU SCREEN
1
Turn the PROGRAM AE select dial to any position
except AUTO LOCK, then press MENU.
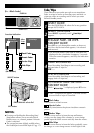
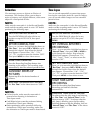
SET INTERVAL TIME
2
Press – or + to move the highlight bar down to
“Interval Timer”, then press FAR or NEAR to cycle
through the choices. Stop when the desired time
appears. Choose from “15s”, “30s”, “1min”, “5min”,
or select to turn the function “OFF”.
CLOSE MENU
3
Press MENU.
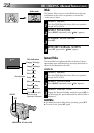
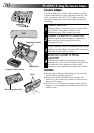
START DELAYED RECORDING
4
Press RECORDING START/STOP. The tally lamp
begins blinking, and the blinking frequency
increases about 5 seconds before recording is to
start. Once recording begins, the lamp stops
blinking but stays lit.
To Release Self-Timer . . .
..... while the tally lamp is blinking, press RECORDING
START/STOP to stop the blinking, then set “Interval
Timer” to “OFF”.
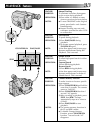
+
–
1min
1/2s
Gain Up S.LX
Tele Macro OFF
Interval Timer OFF
Rec Time OFF
JLIP ID NO. 07
Tally ON
Set Character
Date/Time
END :MENU KEY
OFF
15s30s
1min5min
OFF
1/4s
1/2s1s5s
NEAR
FAR
Tally lamp
Interval Timer
Indicator
Rec Time
Indicator
MENU