


24 EN
VIDEO RECORDING & PLAYBACK
MasterPage: Body_Left
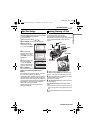
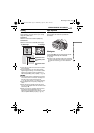
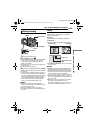
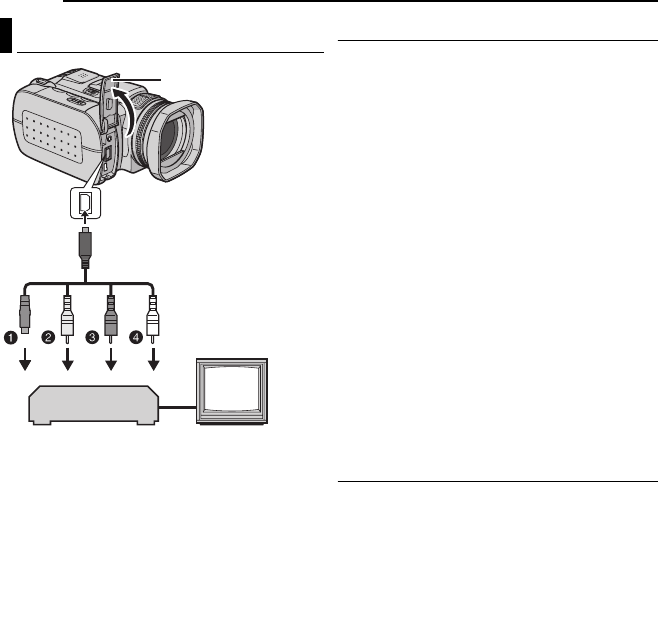
A Black to S-VIDEO IN (Connect when your TV/
VCR has S-VIDEO IN and A/V input
connectors. In this case, it is not necessary to
connect the yellow video cable.)
B Yellow to VIDEO IN (Connect when your TV/
VCR has only A/V input connectors.)
C Red to AUDIO R IN*
D White to AUDIO L IN*
* Not required for watching still images only.
NOTES:
● It is recommended to use the AC adapter as
the power supply instead of the battery pack.
(੬ pg. 15)
● Make sure you adjust the TV sound volume to its
minimum level to avoid a sudden burst of sound
when the camera is turned on.
● To connect the camera to a PC, refer to the
software installation and USB connection guide.
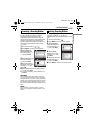
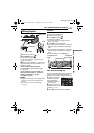
Playback on a TV
1 Make sure all units are turned off.
2 Connect the camera to a TV or VCR as
shown in the illustration.
If using a VCR, go to step 3.
If not, go to step 4.
3 Connect the VCR output to the TV input,
referring to your VCR’s instruction manual.
4 Turn on the camera, the VCR and the TV.
5 Set the VCR to its AUX input mode, and set
the TV to its VIDEO mode.
6 Start playback on the camera. (੬ pg. 22)
To choose whether or not the following
displays appear on the connected TV
● Date/Time
Set [DATE/TIME] to [AUTO], [ON] or [OFF].
(੬ pg. 48, 49)
● Counter
Set [SCENE COUNTER] to [ON] or [OFF].
(੬ pg. 48, 49)
(Pressing INFO button also turns on/off the
displays.)
Dubbing to a VCR
1 Perform steps 1 to 6 above.
2 At the point you want to start dubbing, start
recording on the VCR. (Refer to the VCR’s
instruction manual.)
3 To stop dubbing, stop recording on the VCR,
then stop playback on the camera.
Connecting to a TV or VCR
TV
VCR
Open the cover.
To AV connector
S-Video/Audio/Video
Cable
(provided)
GZ-MC500US.book Page 24 Wednesday, April 13, 2005 7:08 PM