


6
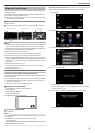
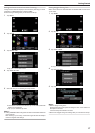
Tap “OK”.
.
0
Setting ends and returns to the menu screen.
Caution :
0
Do not tap areas other than the “+” mark during touch screen adjustment
(steps 4 - 5). Doing so may cause the touch screen to malfunction.
Memo :
0
Adjust by lightly tapping with a corner of an SD card, etc.
0
Do not press with an object with a sharp tip or do not press hard.
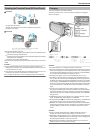
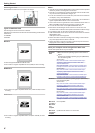
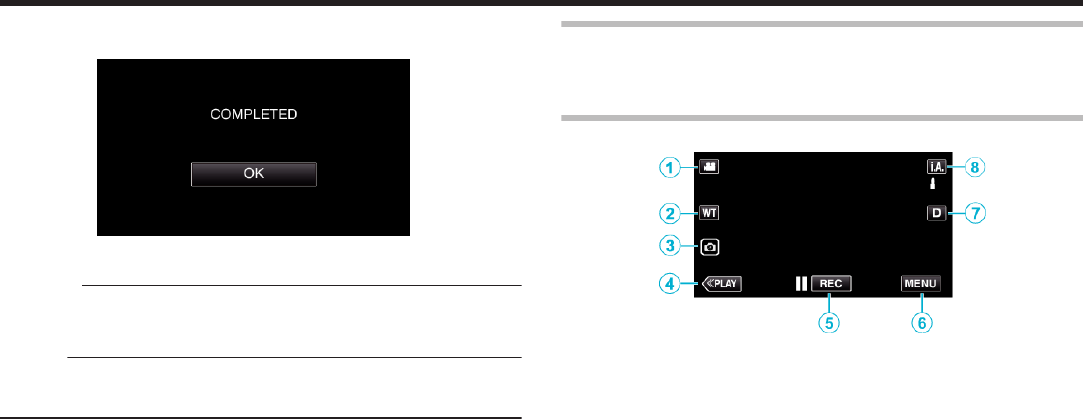
Names of Buttons and Functions on the LCD Monitor
The following screens are displayed during the A video and B still image
modes, and operate as touch screens.
Recording Screen (Video/Still Image)
.
1
A/B (Video/Still Image) Mode Button
0
Switches between A video and B still image modes.
2
Zoom Button
“Zooming” (A p. 25)
3
Still Image Recording Button
0
Records still images during video recording.
“Capturing Still Images During Video Recording” (A p. 22)
4
Playback Mode Button
0
Switches to the playback mode.
5
Recording Start/Stop Button
0
6: Video Recording Start Button
0
7: Video Recording Stop Button
6
Menu Button
“Operating the Menu” (A p. 76)
7
Display Button
Switches the display between full (
m
) and simple (
n
) with every tap of
the button.
0
Simple display: Some displays disappear automatically when the
screen is not operated.
0
Full display: Displays everything. The display button changes from n
to m.
0
When the power is turned off, the display setting will revert to simple
display (n).
8
Recording Mode Button
Switches the recording mode (P Intelligent Auto/H Manual).
Getting Started
10