


Mounting the Camera (Continued)
3
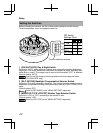
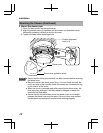
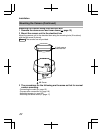
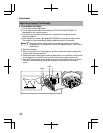
Wind the sealing tape
Wind the sealing tape around the pipe junction (where the conduit hole thread
lines with the pipe screw hole) two or more times.
4
Mount the base to the pipe
Turn and screw the base unit to the pipe in the clockwise direction.
Note
When screwing the pipe, do not screw beyond 12 mm. Doing so can
damage the camera interior.
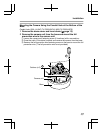
5
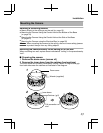
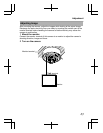
Secure the base unit to the ceiling
Use the M4 screw (x2) to secure the base firmly to the ceiling.
Note
v
Make sure there is no gap between the ceiling and the base.
v
The M4 screws are not provided. Use a suitable type of screws
according to the material of the mounting location.
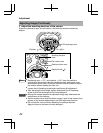
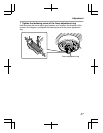
6
Mount the fall prevention wire to a structurally strong location
.
3
4
5
6
8 m m
2mm
M4 mm screw
Fall prevention wire
12 mm and below
Sealing tape
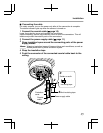
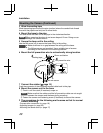
7
Connect the cables (A page 15)
Push the connector of the connected coaxial cable back to the pipe.
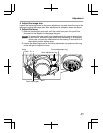
8
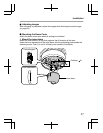
Mount the camera unit to the base
① Push in until the catch (2 locations) snaps on.
Note
Make sure that the cables and the fall prevention cable are not caught
between the camera and the base during mounting.
② Fasten the camera unit fastening screw (2 locations) to secure the camera.
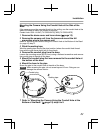
9
The procedures for the following are the same as that for normal
camera mounting
- Process after connection (A page 16)
- Adjusting images (A page 23)
- Mounting the dome cover (A page 17)
Installation
20