


outlined by the bright line frame.
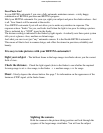
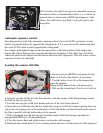
Depending on the subject you may sight the picture with the camera
held in either the horizontal or vertical position. The two illustrations
on this page are meant as examples. When sighting a picture take
special care not to get your fingers in front of the honeycomb cell
window of the exposure meter.
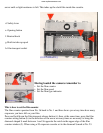
The index finger should be lightly rested on the release button
without, however, depressing the button. Hold the camera steady
when sighting a picture. Also make sure that part of your ever-ready
case gets in front of the lens.
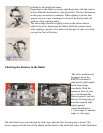
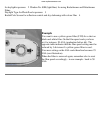
Checking the distance in the finder
The close, medium and
far ranges are in the
RETINA automatic I
indicated by light signals
in the large-image
viewfinder. Hold the
camera in front of your
eye, look through the
finder eyepiece, and turn
the lens focusing ring (a)
until the required light
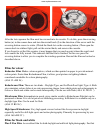
signal appears:
signal identification:
• close range • • medium
range • • • far range
The individual zones are indicated by click stops when the lens focusing ring is turned. The
arrows engraved in the front of the shutter are the limits to the individual zones. In the illustration