


5
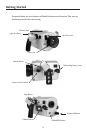
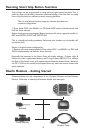
Camera Preparation
1. Install a fully charged Sony NP-FP90 battery.
2. Install a HD DVC tape into your camcorder.
3. If still images are desired, install a Memory Stick Duo.
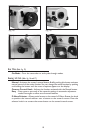
Press the Flash button on the right side of the camcorder to disable the camcorder’s
built-in flash preventing the flash from reflecting back into the camcorder’s lens.
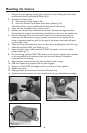
4. Open the camcorder’s LCD screen. Rotate the LCD screen 180 degrees so the
LCD screen is facing away from the camcorder. Close the LCD screen against the
camcorder body so the screen is facing outward.
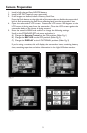
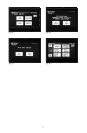
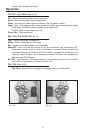
5. Enter the camera’s MENU and confirm or change the following settings.
Scroll to the STANDARD SET sub-menu and select it.
A) Change the Remote Control to the ON position. (Refer Fig. 1)
B) Change the REC LED to the OFF position. (Refer Fig. 2)
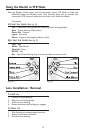
C) Change the DISPLAY to the V-OUT/PANEL position. (Refer Fig. 3)
If you’re using a monitor, this will display the camcorders icons, remaining battery
time, remaining tape time and other information in the Light & Motion monitor.
(Fig. 1) (Fig. 2)
(Fig. 3) (Fig. 4)