


GETTING STARTED
Remove your VS560 monitor from the soft-pack by first opening the
front of the case. This is accomplished by pulling the flap at the top
and sides of the soft-pack until the Velcro strips separate. Reach into
the soft-pack on top of the monitor and grab the molded inset handle
about halfway back. Pull the monitor forward tilting the top towards
you until it comes out of the soft-pack case. Place the monitor on a
flat surface and open the battery compartment door located on the
front lower section of the monitor case. This is done by gently apply-
ing downward pressure on the grooved finger inset at the top of the
battery door and pulling forward. Connect the battery leads to the
battery terminals (red lead (with fuse) to battery positive and black
lead to battery negative). Replace battery door and place monitor
back into padded soft-pack case. Close front of case by re-attaching
Velcro strips.
Then turn the soft-pack to the backside and remove the cable reel
from the back pouch. Reach into the lower left corner of the rear
pouch and undo the Velcro door. This allows access to the plug-in
port for the camera. Plug the camera cable into the upper plug-in
port. Take notice that the plug-in is not round but has a flat side. This
is designed to assist in lining up the pins with the sockets in the plug
and help eliminate the bending of connector pins. Do NOT force the
plug into the receptacle, you may have it mis-aligned. There will be
some resistance when plugging in the camera due to the molded
seal rings located on the plug, however, if lined up properly, this
should go together quite easily. The plug-in port marked ACC is a
dead port and will not operate the camera. You should not attempt to
plug the camera into this location.
Once that camera is plugged into the monitor, you can replace the
camera cable into the rear storage pouch and pull the drawstring for
a snug fit. Place the camera into the camera pouch and zip shut for
safe storage. You are now ready to head to the lake. Once you reach
your destination, remove the cable reel from the rear storage pouch
and remove the required length of cable. Open the front of the soft-
pack so that the monitor and keypad are fully exposed. Turn the
camera power on by depressing the ON button on the keypad.
The system will power up and the monitor screen will display “OVS
SYSTEM START-UP.” The camera will rotate on start up and the
lights will blink three times signifying the system is ready. Once the
start-up message clears from the screen the monitor will display the
picture that’s being transmitted by the camera. Lower the camera
5
into the water to the desired depth and secure the cable in the cable
cleat mounted at the left rear corner of the monitor soft-pack. As with
all CRT displays, bright light can washout the display making viewing
difficult. If this occurs, rotate the system so that the light source is
not directly on the monitor screen. In extreme bright light conditions
it may be necessary to use the viewing shroud to shield the monitor
from the light source. To use the viewing shroud, remove the
protective cap from the face of the shroud located on the front of the
padded soft-pack. Grab the face of the view shroud and pull towards
you until all three collapsible parts are fully extended. The shroud is
not fully extended until you hear the telltale click of each part as it
locks into place. This clicking locks the shroud into position so it won’t
collapse on its own. To collapse the shroud to its original position,
push on the face of the shroud until all three parts collapse inside
each other and then the replace the protective cover.
The depth of field (distance the camera can see underwater) depends
on the clarity of the water and available light at the depth the camera
is used. In extremely clear water the depth of field can be several feet
and in cloudy or muddy water the depth of view can be reduced to
only a few inches due to particles suspended in the water.
ON SCREEN DISPLAYS
The VS560 utilizes a series of ON SCREEN icons to indicate user
options and system information.
Lighting Options - The VS560 utilizes visible LED light and incorpo-
rates Darkwater Technology to create improved clarity and viewing
distance. The VS560 lights can be turned on by depressing the
LIGHT key at the monitor or on the wireless remote. Depressing the
key a second time will turn the lights OFF.
Battery Status - The condition of charge remaining in your battery can
be monitored by depressing the BATT key located on the keypad.
The percentage of charge remaining will appear in the upper right
hand corner of the monitor and remain on the screen for a three
second interval.
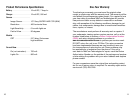
Low Battery Warning - When the battery charge remaining falls below
10 percent, a low battery warning icon will flash in the upper right
corner of the monitor. The low battery icon will remain on the screen
and continue to flash until the system eventually shuts down. If the
battery charge remaining gets too low, the picture will get fuzzy or
4