


- 9 -
Note
If the LCD monitor is off, you will not be able to take photographs when
the AF/Flash indicator blinks green. When the monitor is on, however,
photographs can be taken even if the camera is not properly focused.
Check focus in the LCD monitor before pressing the shutter-release
button all the way down.
First Steps: Taking Your First Photograph
Note
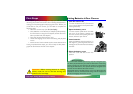
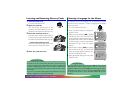
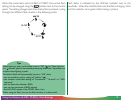
When using the viewfinder at ranges of less than 90cm (one
yard), frame your photographs using the smaller of the two
frames in the viewfinder display (the area shaded in purple in the
illustration on the right).
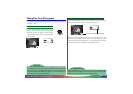
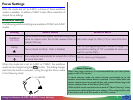
Step 5—Half-press the shutter-release button
When the shutter-release button is pressed half way, the camera
will automatically adjust focus according to the distance to the
subject. If the focus operation is successful, the AF(Autofocus)/
Flash indicator next to the viewfinder will glow green
. The focus
setting will remain unchanged as long as the shutter button
is half-
pressed (see the section “Focus Lock” in the Fast Track Guide)
.
The
zoom ratio for digital zoom cannot be changed while focus lock is
in effect.
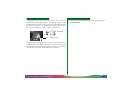
If the camera is unable to determine the distance to the subject, the
AF/Flash indicator will blink rapidly. In this case you can use focus
lock to focus on another object at the same distance, then
recompose your photograph (see the Pocket Guide, page 4, for
more information on autofocus).
If the AF/Flash indicator blinks red, the flash is charging, and you
will need to take your finger off the shutter-release button and wait
several seconds before taking a photograph.
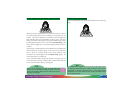
Step 6—Take a photograph
To take a photograph, press the shutter-release button all the way
down.