


E9
Taking 3D Pictures
Reference Section
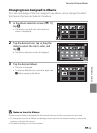
Connecting the COOLPIX S100 to a TV or Monitor for Playing 3D
Pictures.
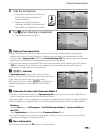
• 3D pictures taken on this camera can be played back in 3D only on a
3D-compatible TV or monitor.
• 3D pictures cannot be played back in 3D on the camera monitor. Only the left
eye image of a 3D picture is displayed during playback.
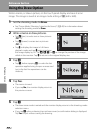
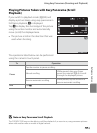
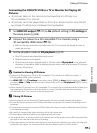
1 Set HDMI 3D output (E 91) to On (default setting) in TV settings in
the setup menu (A 88).
2 Connect the camera to a 3D-compatible TV or monitor using a
3D-compatible HDMI cable (E 35).
• Refer to the documentation included with the TV or monitor for details on how to
make the settings.
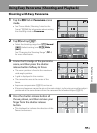
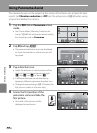
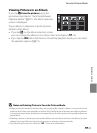
3 Set the playback mode to 3D playback (A 70)
• Only 3D pictures are played back and output.
• Playback zoom is not possible.
• 3D pictures are output (played back) in 3D even when 3D playback is not selected.
However, it may take a while to display pictures when switching between 3D pictures
and non-3D pictures.
B Caution for Viewing 3D Pictures
• To play back 3D pictures in 3D on a 3D-compatinle TV or monitor via HDMI connection, a
3D-compatible HDMI cable is required.
• Set HDMI (E 91) in TV settings in the setup menu (A 88) to Auto (default setting) or 1080i. If
you select 480p or 720p, pictures cannot be played back in 3D and 3D playback (A 70) cannot
be selected.
• When viewing 3D pictures on a 3D-compatible TV or monitor for an extended period of time, you
may experience discomfort such as eye strain or nausea. Carefully read the documentation
included with your TV or monitor to ensure proper use.
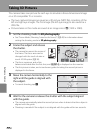
C Taking 3D Pictures
• Moving subjects are not suited to 3D photography. We recommend shooting still subjects.
• Pictures have a less pronounced 3D feel as the distance between the camera and background is
increased.
• Pictures may have a less pronounced 3D feel when the subject is dark or when the second picture
is not aligned precisely.
• Be careful of camera shake when shooting with a high zoom ratio.
• Pictures taken under dim lighting may appear grainy with noise.
• The angle of view (i.e., the area visible in the frame) seen in the saved picture will be narrower than
that seen in the monitor at the time of shooting.
• If the camera does not take the second picture and cancels the shooting even when you align the
guide with the subject, try shooting with the shutter-release button or touch shutter.