


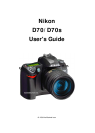


Nikon D70/D70s User’s Guide
SLOW is the same as NORMAL, since exposure times are short. SLOW unlocks the camera in P and A
exposure modes to make exposures as long as it wants to in dim light.
Have a look at most issues of National Geographic and you'll see many indoor shots made in this
mode. The background exposes correctly, people may be blurred, and a burst of flash freezes them
along with the blurry ghost images.
Normal and SLOW do the same thing in S and M exposure modes, since you or the camera may select
any shutter speed in these modes regardless of flash sync.
Red-Eye SLOW (eye and SLOW icon): This is the SLOW mode and redeye. I don't use it for the
same reason I don't use Redeye.
REAR (called REAR on the top LCD): Normally the flash goes off the instant the shutter opens. With
long exposures and blurred ghost images you ordinarily get the ghost streaming out in front of the
subject. Think about it: if a car is driving, the flash goers off and freezes it, then the car moves
forward. You'll have a ghost image ahead of the car, which usually looks stupid. Select REAR mode to
have the flash go off as the shutter closes. Now you'll have motion blurring behind the frozen flash
image.
Another reason to select REAR is because the flash goes off at the end of the exposure. People
presume photos are made the instant a flash fires, then leave. This wreaks havoc with long
exposures. If you use REAR mode with long exposures they'll stay put and not move until the end. Of
course you'll also want to select flash lock to eliminate the preflash. Read about flash lock later on my
Custom Menus pages.
REAR doesn't do anything with short exposures. REAR also engages SLOW, but SLOW doesn't light up
on the LCD. This lack of the SLOW indication is a flaw in the firmware. No big deal. In REAR the D70's
exposure setting in Program mode chooses slower shutter speeds and small apertures if you're in
daylight.
Trick FV Lock Mode: You set this in the Custom Menus. Check it out; it prevents people from
blinking with flash!.
CONTROLS AND SETTINGS: TOP PANEL
From left to right:
Exposure Mode Dial (Left side): I use "P" for program auto exposure. In this mode the camera
chooses the f/stop and shutter speed for you. If I want to use different apertures or shutter speeds I
rotate the rear command dial, which selects alternate combinations of f/stops and shutter speeds
which give the same exposure. Nikon calls this "Program Shift." A "
*
" is added next to the P on the
top LCD to let you know you've chosen a different combination for exposure.
If you want to use only one aperture or one shutter speed then use S or A mode. If you want to set it
the hard way, use M, manual, mode.
Metering Mode: Its little icon shows four corners and a central dot. It looks a little like a [ * ]. I use
the default of Matrix, which is shown by the four corners. Spin the control knob while holding this
button and you can select center weighted (a circle) and spot (a dot). I never use these other modes.
* Green Dot (combined with metering button). This resets many of the camera's controls to their
defaults when held in along with the other green dot button on the top left of the back of the camera.
This is handy at the beginning of each day, since it will reset everything from whatever whacky ISO,
white balance, file format and other settings you were using the night before.
© Ken Rockwell 6 of 6