


18
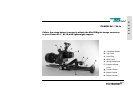
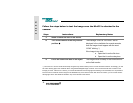
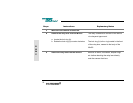
Follow the steps below to test the image once the Mini35 is attached to the
camera:
Steps Instructions Explanatory Notes
1 Install a 35mm film lens in the mount.
2 Turn on the camera in the fully manual
position.Æ
The message “CHECK THE LENS” will be
displayed in the viewfinder for several seconds,
then the image should appear with the word
“LENS” blinking. *)
If the image is too dark:
a. Open the iris on the film lens.
b. Open the iris on the relay lens.
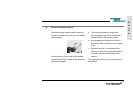
3 Focus the 35mm film lens on an object. The image should be sharp in the viewfinder and
on the field monitor.
*) The Canon XL1 and XL1S will electronically recognize only lenses made by Canon to work with these cameras. Accordingly, you will
see a lens warning light in the viewfinder when using the Mini35Digital Image converter. This is normal and will have no effect on the
footage you shoot. With the XL1 camera, you cannot eliminate the lens warning light from blinking in the viewfinder, but it is possible to
remove it from an external monitor using the “ON SCREEN” key of the remote control. With the XL1S camera, you can control the lens
warning light via the “EFV DISPLAY ON/OFF” key on the left side of the camera.
C
a
n
o
n