


34
Basic Photography and Playback : Auto Mode
Exposure Compensation
Exposure compensation is used to alter the exposure from the value suggested by
the camera to make pictures brighter or darker.
1
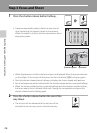
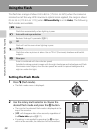
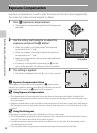
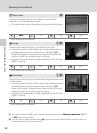
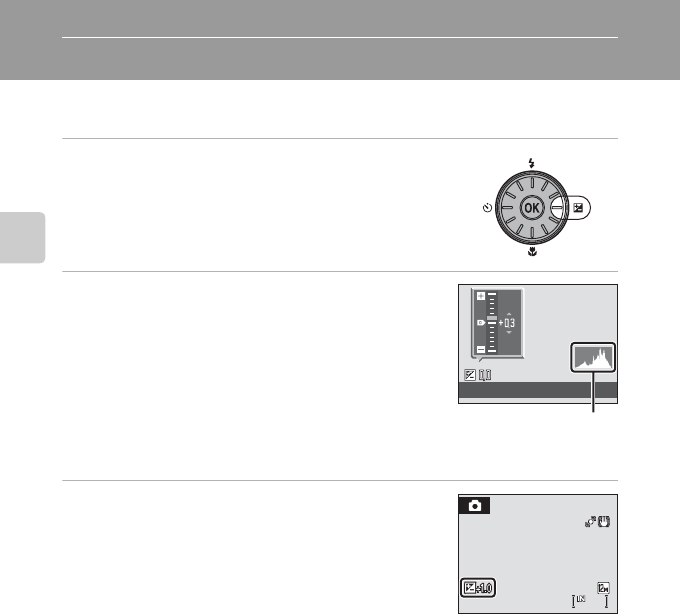
Press o (exposure compensation).
• The exposure compensation guide and histogram are
displayed.
2
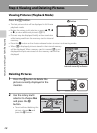
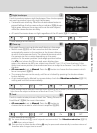
Use the rotary multi selector to adjust the
exposure and press the k button.
• When the subject is too dark: adjust the exposure
compensation to “+” side.
• When the subject is too bright: adjust the exposure
compensation to “–” side.
• Exposure compensation can be set to values between
–2.0 and +2.0 EV.
• If a setting is not applied by pressing the k button
within a few seconds, the selection will be cancelled.
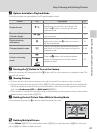
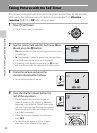
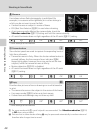
3
The setting is applied.
• The value is displayed with the H icon in the monitor.
C Exposure Compensation Value
The exposure compensation value applied in A (auto) mode is
stored in the camera’s memory even after the camera is turned off,
and reapplied the next time A (auto) mode is selected.
D Using Exposure Compensation
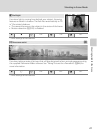
• The camera tends to lower exposure when the frame is dominated by brightly lit objects (for
example, sunlit expanses of water, sand, or snow) or when the background is much brighter than
the main subject.
• Negative compensation may be called for when large areas of the frame contain very dark objects
(for example, a swath of dark green leaves) or when the background is much darker than the main
subject.
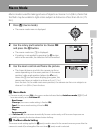
D Using the Histogram
A histogram is a graph showing the distribution of tones in the image.
• The horizontal axis corresponds to pixel brightness, with dark tones to the left and bright tones to
the right. The vertical axis shows the number of pixels.
• Increasing exposure compensation shifts tone distribution to the right, and decreasing it shifts
tone distribution to the left.
• Use as a guide when using exposure compensation and shooting without the flash.
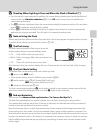
Exposure compensation
Histogram
13
13
13