


16
í Using the Flash
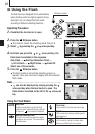
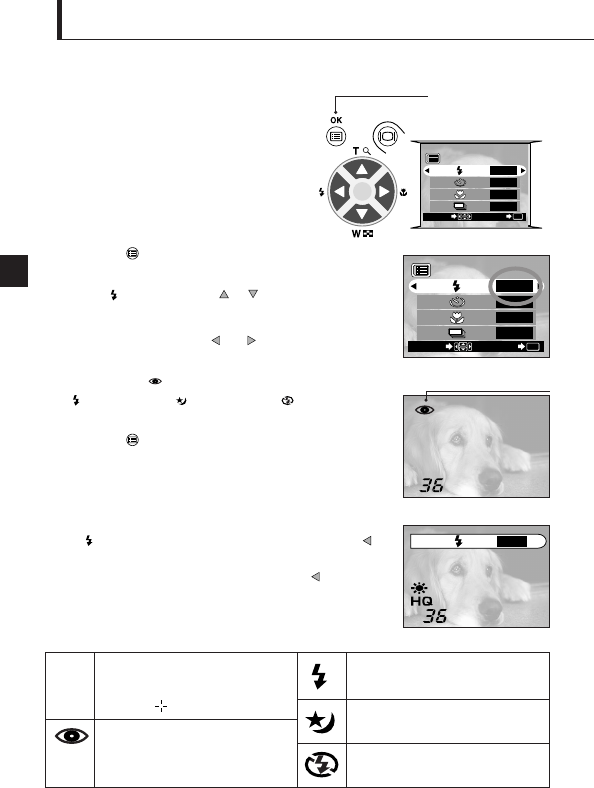
Operating Procedure
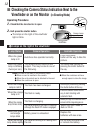
1. Check that the lens barrier is open.
2. Press the OK/menu button.
¼ The monitor shows the shooting mode menu 1/3.
3. Select by pressing the or arrow pad key.
4. Each time you press the or arrow pad key, the
flash mode is switched in the sequence:
Auto-Flash[ Red-Eye Reduction Flash[
Fill-In Flash[ Night Scene[ Flash Off.
Select one of these modes.
5. Press the OK/menu button.
¼ The flash mode is set and the shooting screen re-
appears. Now you can shoot images with the selected
flash mode.
Arrow pad
OK/menu button
Shooting mode menu 1/3 screen
1/3
AUTO
OFF
OFF
OFF
END
OK
SELECT
1/3
AUTO
OFF
OFF
OFF
END
OK
SELECT
Shooting mode menu 1/3 screen
SHQ
Note..........................................................
¼ can also be displayed by simply pressing the
arrow pad key when the lens barrier is open. The
flash mark is inscribed on the left of the arrow pad
key.
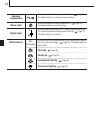
Using the Flash Modes
AUTO
AUTO
Red-Eye Reduction Flash
Auto-Flash
The flash fires automatically in low light or back light
conditions.To shoot a subject with back light, position the
AF target mark ( ) over the subject in the viewfinder.
Fill-in Flash
Use this mode to fire the flash with every image.
Night Scene
Use this mode when shooting a subject against a
night background.
Flash Off
Use this mode for shooting in locations where
flashes are prohibited (such as a museum).
Red-Eye Reduction Flash
The light from the flash may make the subject’s
eyes appear red in pictures. This mode reduces
this phenomenon.
The flash has been designed to fire automatically
when shooting under low light or against strong
back light. You can change this flash mode
according to different shooting situations.