


22
í
Varying the Image Color Tone (White Balance Control)
Operating Procedure
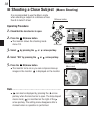
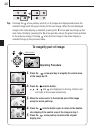
1. Check that the lens barrier is open.
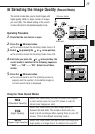
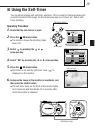
2. Press the OK/menu button.
¼ The monitor shows the shooting mode
menu 1/3.
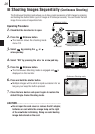
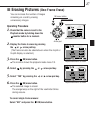
3. Press the or arrow pad key to
display the shooting mode menu 2/3.
and then select .
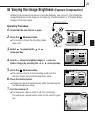
4. Select one of the white balance control
modes listed below by pressing the or arrow pad
key.
5. Press the OK/menu button.
¼ The camera returns to the shooting mode and the
monitor shows the white balance setting.
6. Press the shutter button.
¼ Images can be shot successively while maintaining the
selected white balance setting.
7. Close the lens barrier to turn the camera off.
¼ The white balance setting is restored to AUTO.
This camera incorporates electronic circuitry to automatically adjust color hues so that they look natural
(auto white balance control circuit). If auto white balance control does not produce accurate results due to
weather or illumination, you can control the white balance manually.
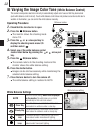
Arrow pad
OK/menu button
Shooting mode menu 1/3 screen
1/3
AUTO
OFF
OFF
OFF
END
OK
SELECT
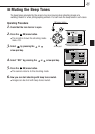
2/3
HQ
AUTO
ON
END
OK
SELECT
Shooting mode menu 2/3 screen
SHQ
White balance setting
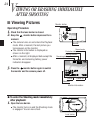
2/3
HQ
ON
END
OK
SELECT
Shooting mode menu 2/3 screen
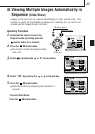
This is the default setting, which is not displayed
on the monitor.The white balance is controlled
automatically so that colors look natural.
The white balance is controlled so that colors
look natural in outdoors under a clear sky.
The white balance is controlled so that colors
look natural in outdoors under a cloudy sky.
The white balance is controlled so that colors
look natural under incandescent lighting.
The white balance is controlled so that colors look
natural under fluorescent lighting.
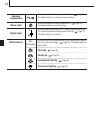
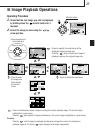
AUTO
White Balance Settings
Clear Sky
Cloudy Sky
Incandescent
Lamp
Fluorescent
Lamp