


19
English
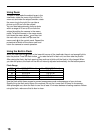
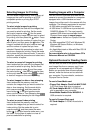
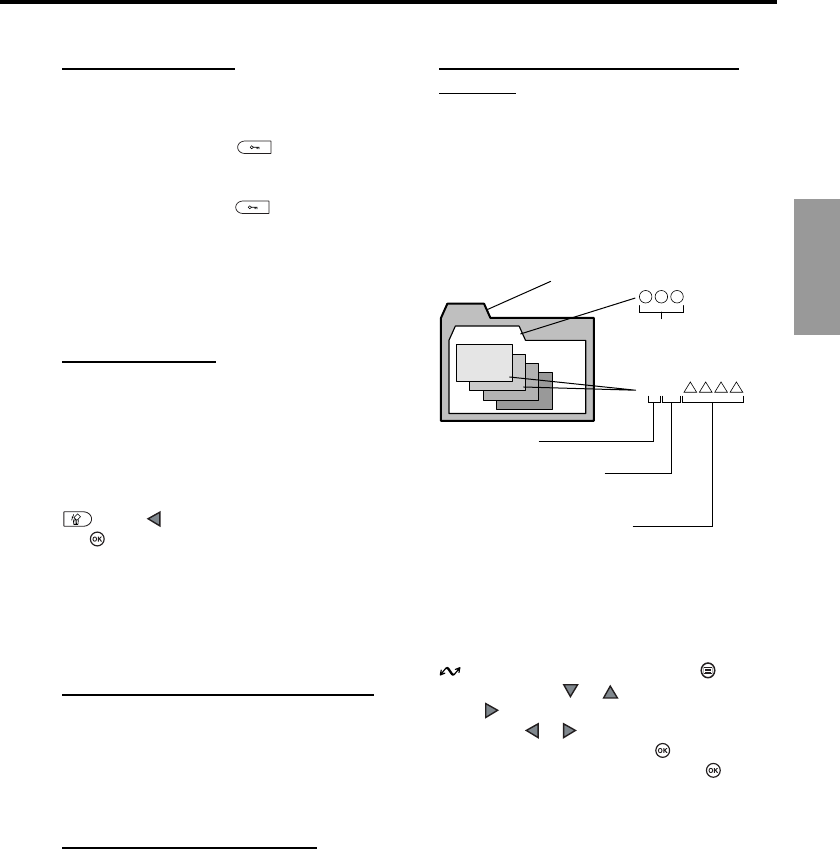
DCIM
100 OLYMP
P2030001.jpg
P2030002.jpg
P2030003.jpg
P2030004.jpg
All folders
Folder number
(100~999)
File name
Pmdd .jpg
OLYMP
Month (10, 11, 12 are
numbered A, B, C)
Day (01~31)
File number (0001~9999)
After taking 9999 pictures, the counter is reset
to 0001 for the next picture, the folder number
increments by 1 to name and create a new
folder where the next image (file) is stored.
Folder name
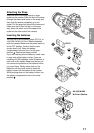
Selecting an Image File Naming
Scheme
The camera automatically assigns a file name
to every image and then saves it in a folder on
the card. These file names can be used to
select and process images on a computer.
Folders are named with three digits in the
format nnnOLYMP. Files are named with four
digits in the format Pmdd̅̅̅̅.jpg.
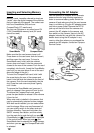
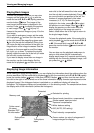
Set the mode dial to the setup/connection mark
, and then press the menu button . On the
arrow pad, press or to select FILE NAME.
Press to move the green highlight to the
right. Press or to move the green highlight
to AUTO or RESET. Press the button to
select the setting, and then press the button
to close the menu.
You can select the naming scheme with the
FILE NAME item in the setup/connection mode
menu. The AUTO selection numbers all files
and folders consecutively for every card you
use to ensure that no file names are duplicated.
The RESET selection restarts file numbering
every time you insert another card.
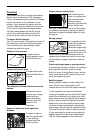
Protecting Images
Images stored on a card can be protected from
accidental deletion. Enter the playback mode
and display the image that you want to protect.
Press the protect button . A protect mark
is displayed on the image. To remove
protection, display the protected image and
press the protect button to switch off the
protect mark. If you want to protect all the
images on a SmartMedia card, attach a protect
seal to the card. Please remember that
protecting an image does not protect it if the
card is formatted.
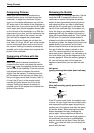
Deleting Images
Delete poorly exposed or other images that you
do not want to keep to create more storage
space on a card. Enter the playback mode and
display the image that you want to delete. (You
can also delete images in the index display.
Just move the green highlight to the image that
you want to delete.) Press the erase button
, press to select YES, and then press
the button. The card access lamp blinks as
the image is erased. If you want to delete all
images on the card, select the card that you
want to erase. Use the card erase option of the
CARD SETUP feature in the shooting mode to
erase all the images on the card.
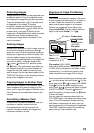
Copying Images to Another Card
With two cards installed in the camera, you can
select images one by one for copying to the
other card, or copy all images to the other card.
Insert the source and destination cards in the
camera.
Formatting a Memory Card
A card which has been formatted for use on a
computer or another camera, must be
formatted before it can be used with this
camera. Formatting deletes all images and
information stored on a card.