


57
EN
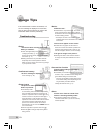
Camera shake
“Taking pictures (or movies) without
camera shake”
Taking pictures using [IMAGE STABILIZER]
(p. 29)
When a picture is taken of a shadowy subject, the
CCD
*1
shifts to correct for camera shake even if
the ISO speed is not increased. This function is
also effective when taking pictures at a high zoom
magnifi cation.
*1
A device that takes light received through the
lens and converts it into electric signals.
Shooting movies using [DIS MOVIE MODE]
(p. 29)
Taking picture with [j SPORT] (p. 30)
Since you can take pictures with a high shutter
speed by setting [j SPORT], it’s also effective for
blurry subjects.
Taking pictures at a high ISO sensitivity
If a high ISO sensitivity is selected, pictures can
be taken at a high shutter speed even at locations
where a fl ash cannot be used.
[ISO] (p. 27)
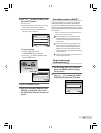
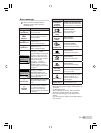
Exposure (brightness)
“Taking pictures with the right
brightness”
Taking pictures of a subject against a backlight
A face against the backlight is brightened.
[SHADOW ADJ] (p. 29)
Taking pictures using [FACE DETECT] for
[AF MODE] (p. 28)
Appropriate exposure is obtained for a face
against the backlight, and the face is brightened.
Taking pictures using [n] for [ESP/n] (p. 28)
The picture can be taken based on the brightness
at the center of the monitor, so it’s not affected by
the light in the background.
Taking pictures using [FILL IN] (p. 21) fl ash
A subject against a backlight is brightened.
Taking pictures of a white beach or snow
scene
Set the mode to [q BEACH & SNOW] (p. 30)
●
●
●
●
●
●
●
●
●
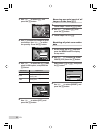
Taking pictures using exposure compensation
(p. 21)
Adjust the brightness while viewing the screen
for taking the picture. Normally, taking pictures of
white subjects (such as snow) results in images
that are darker than the actual subject. Use the
F button to adjust in the positive (+) direction
to express whites as they appear. When taking
pictures of black subjects, on the other hand, it is
effective to adjust in the negative (–) direction.
Color hue
“Taking pictures with colors at the same
shade as they appear”
Taking pictures by selecting [WB] (p. 27)
Best results in most environments can normally
be obtained with the AUTO setting, but for some
subjects, you should try experimenting with
different settings. (This is especially true for
sunshade under a clear sky, mixed natural and
artifi cial light settings, and so on.)
Image quality
“Taking sharper pictures”
Taking pictures with the optical zoom
Avoid using [DIGITAL ZOOM] (p. 28) to take
pictures.
Taking pictures at a low ISO sensitivity
If the picture is taken with a high ISO sensitivity,
noise (small colored spots and color unevenness
that were not in the original image) can occur, and
the image can appear grainy.
[ISO] (p. 27)
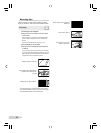
Panorama
“Taking pictures so that the frames are
stitched smoothly”
A tip for panoramic shooting
Taking pictures by pivoting with the camera at the
center prevents shifting of the image. When taking
pictures of close objects in particular, pivoting with
the lens end at the center produces favorable
results.
[N PANORAMA] (p. 31)
●
●
●
●
●