


35
EN
Changing the printer’s settings
for printing [ CUSTOM PRINT]
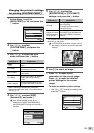
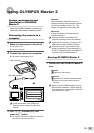
1
Follow Steps 1 and 2 for
[EASY PRINT] (p. 34), and press the
B button.
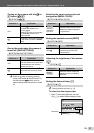
EASY PRINT
USB
SET
OK
EXIT
CUSTOM PRINT
PC
2
Use kl to select
[CUSTOM PRINT], and press the
B button.
3
Use kl to select the print
mode, and press the B button.
Submenu 2 Application
PRINT
This prints the image selected in
Step 6.
ALL PRINT
This prints all images stored in the
internal memory or card.
MULTI PRINT
This prints one image in a multiple
layout format.
ALL INDEX
This prints an index of all images
stored in the internal memory
or card.
PRINT ORDER
*1
This prints images based on the
print reservation data on the card.
*1
[PRINT ORDER] is available only when print
reservations have been made. “Print Reservations
(DPOF)” (p. 37)
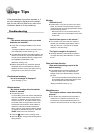
4
Use kl to select [SIZE]
(Submenu 3), and press n.
If the [PRINTPAPER] screen is not
displayed, the [SIZE], [BORDERLESS],
and [PICS/SHEET] are set to the printer’s
standard.
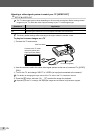
STANDARDSTANDARD
PRINTPAPER
SET
OK
MENU
BACK
SIZE BORDERLESS
5
Use kl to select the
[BORDERLESS] or [PICS/SHEET]
settings, and press the B button.
Submenu 4 Application
OFF/ON
*1
The image is printed with a border
around it ([OFF]).
The image is printed to fi ll the
entire paper ([ON]).
(The number of
images per sheet
varies depending
on the printer.)
The number of images per sheet
([PICS/SHEET]) is selectable only
when [MULTI PRINT] is selected
in Step 3.
*1
The available settings for [BORDERLESS] vary
depending on the printer.
If [STANDARD] is selected in Steps 4 and 5,
the image is printed at the printer’s standard
settings.
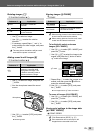
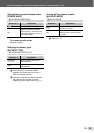
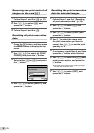
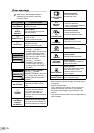
100-0004
OK
4
IN
SINGLEPRINT MORE
PRINT
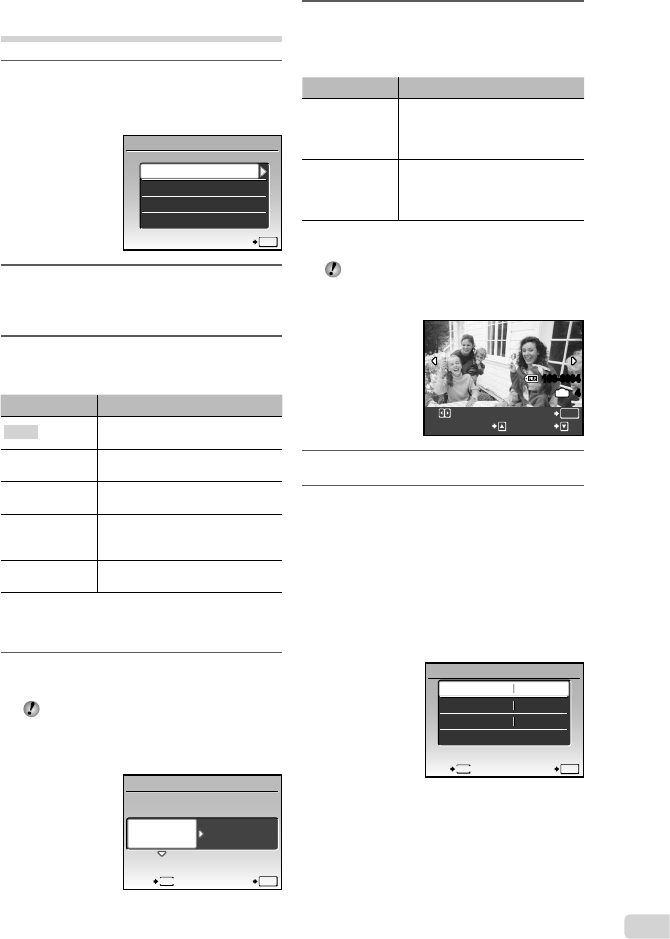
6
Use mn to select an image.
7
Press k to make a print
reservation for the current image.
Press l to make the detailed
printer settings for the current
image.
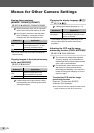
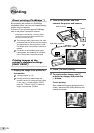
To make the detailed printer settings
1 Use klmn to select the setting, and
press the B button.
SET
OK
EXIT
MENU
1
PRINT INFO
DATE
FILE NAME
<x
WITHOUT
WITHOUT
P