


43
EN
Shooting tips
When you are unsure of how to take a picture
that you envision, refer to the information below.
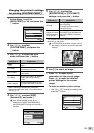
Focusing
“Focusing on the subject”
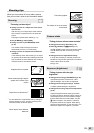
Taking a picture of a subject not in the center
of the screen
After focusing on an object at the same distance
as the subject, compose the shot, and take the
picture.
Pressing the shutter button halfway (p. 14)
Set [AF MODE] (p. 26) to [iESP]
Taking a picture in [AF TRACKING] mode
(p. 26)
The camera tracks the subject movement
automatically to focus on it continuously.
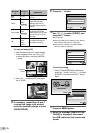
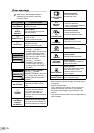
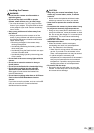
Taking a picture of subjects where autofocus
is diffi cult
In the following cases, after focusing on an object
(by pressing the shutter button halfway down) with
high contrast at the same distance as the subject,
compose the shot, and take the picture.
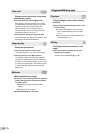
Subjects with low contrast
When extremely bright objects
appear in the center of the
screen
Object with no vertical lines
*1
*1
It is also effective to compose the shot by holding the
camera vertically to focus, and then returning to the
horizontal position to take the picture.
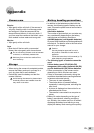
When objects are at different
distances
●
●
●
●
Fast-moving object
The subject is not in the center
of the frame
Camera shake
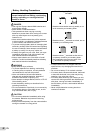
“Taking pictures without camera shake”
Taking pictures using h mode (p. 18)
Select j (SPORT) in
s
mode (p. 17)
The j (SPORT) mode uses a fast shutter speed
and can reduce the blur incurred by a moving
subject.
Taking pictures at a high ISO sensitivity
If a high ISO sensitivity is selected, pictures can
be taken at a high shutter speed even at locations
where a fl ash cannot be used.
[ISO] (p. 25)
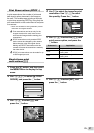
Exposure (brightness)
“Taking pictures with the right
brightness”
Taking pictures using [FACE DETECT] (p. 26)
Appropriate exposure is obtained for a face
against backlight, and the face is brightened.
Taking pictures using [FILL IN] (p. 19) fl ash
A subject against backlight is brightened.
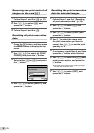
Taking pictures using exposure compensation
(p. 20)
Adjust the brightness while viewing the screen
for taking the picture. Normally, taking pictures of
white subjects (such as snow) results in images
that are darker than the actual subject. Use the
F button to adjust in the positive (+) direction
to express whites as they appear. When taking
pictures of black subjects, on the other hand, it is
effective to adjust in the negative (-) direction.
●
●
●
●
●
●