


23
24
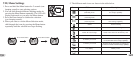
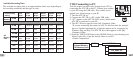
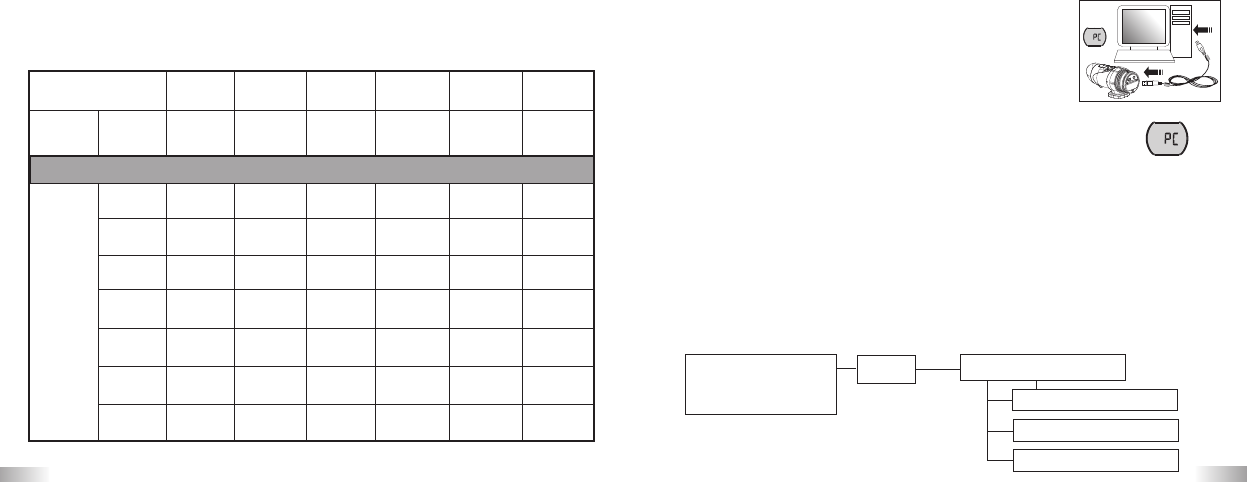
Available Recording Time
The available recording time is an approximation (these vary depending on
the recording conditions and the type of card).
Picture quality
setting
VGA VGA QVGA QVGA QQVGA QQVGA
30 fps 15 fps 30 fps 15 fps 30 fps 15 fps
Internal
Memory
SD
Memory
Card
32 MB
32 MB
64 MB
128 MB
256 MB
512 MB
1 GB
2 GB
52 s 1 min 20 s 1 min 36 s 3 min 14 s 5 min 11 min 10 s
52 s 1 min 20 s 1 min 36 s 3 min 14 s 5 min 11 min 10 s
2 min 3 min 4 min 7 min 11 min 25 min
4 min 6 min 7 min 14 min 23 min 50 min
8 min 12 min 14 min 28 min 45 min 99 min
15 min 24 min 28 min 57 min 89 min 198 min
30 min 48 min 57 min 115 min 178 min 397 min
60 min 96 min 114 min 230 min 356 min 794 min
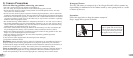
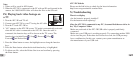
VIII) Connecting to PC
You can acquire recorded video footage from a PC by
connecting the ATC-2K to the PC. Connect your camera
to your PC using the USB cable. This enables you to
upload your video footage to your PC.
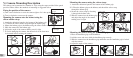
1. Turn the ATC-2K on.
2. Connect the ATC-2K to a PC via the USB cable.
3. “PC” appears on the ATC-2K LCD screen, which means
ATC-2K is connected to your PC.
4. The ATC-2K drive appears in the [My Computer] folder.
*If you are connecting the camera to a PC for the first time, the required
driver is installed automatically so that the camera can be recognized by
Windows Plug and Play. The ATC-2K drive then appears on the [My
Computer] folder.
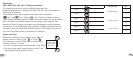
5. Open the '100COACH' folder in the [DCIM] folder to start selecting your
desired video files. Copy the desired video to your PC.
• Folder Composition:
Removable disk
• Internal Memory
• SD Memory Card
DCIM
100COACH
AVI_0001. avi
AVI_0002. avi
AVI_9999. avi