


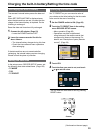


62
Shooting photos (continued)
Setting the aspect ratio / recording
pixels
You can select an aspect ratio based on the your
intended print or playback method. In addition, the
higher the recording pixel setting, the sharper your
printed images will appear.
Set the aspect ratio with the ASPECT RATIO item
in the setting menu PICTURE screen.
Set the recording pixels with the PICTURE SIZE
item in the setting menu PICTURE screen.
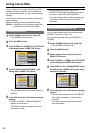
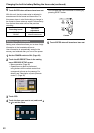
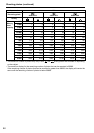
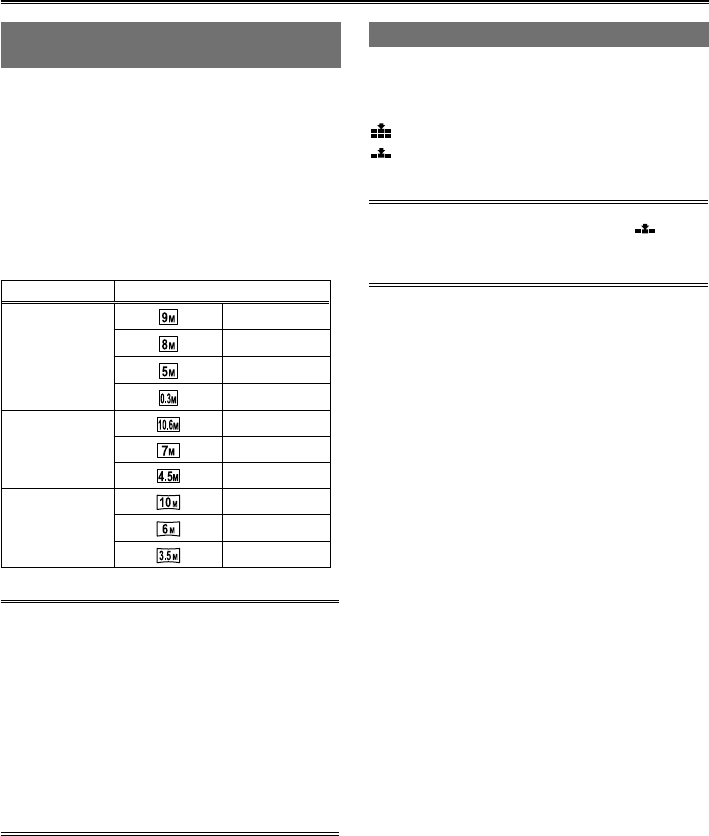
Recording pixels
Aspect ratio Recording pixels
4:3
3520×2640
3264×2448
2560×1920
640×480
3:2
3984×2656
3264×2176
2592×1728
16:9
4224×2376
3328×1872
2560×1440
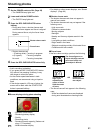
If you set the aspect ratio to 4:3 or 3:2, black
bars will appear on the left and right edges of the
screen.
When you print photos recorded with this camera
in 16:9 aspect ratio, the edges may be cut off. Be
sure to check beforehand when printing at a store
or with other printers.
The recording pixel settings that are available
vary depending on the selected aspect ratio.
Recording may take longer with higher recording
pixel settings.
The maximum zoom ratio is x 12.
•
•
•
•
•
■
Setting the picture quality
You can select the quality for recorded pictures.
Set the picture quality with the QUALITY item in
the setting menu PICTURE screen.
: Record photos with high image quality.
: Prioritize quantity, and record photos with
standard image quality.
When shooting with QUALITY set to ,
photos may appear blurry depending on the
subject.
•