


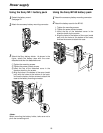
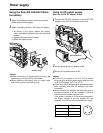

27
Adjusting the white shading
Follow the procedure outlined below when the white
shading needs to be re-adjusted.
Adjustment method
<Notes>
O
The method below can be used for the white
shading adjustments with most lenses. However,
with some very special lenses, a different
adjustment method may be necessary.
O
Even when the white shading has been adjusted,
tinting may occur in the vertical direction near the
lens aperture open position. This is a phenomenon
which is inherent to lenses and optical systems and
is not indicative of malfunctioning.
SHUTTER: OFF
GAIN: L (0 dB)
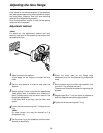
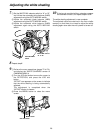
JOG dial button
MENU button
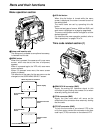
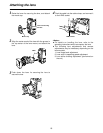
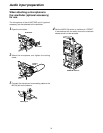
1
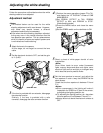
Attach the lens to the camera.
At this stage, do not forget to connect the lens
cable.
2
Set the electronic shutter to OFF, and set the gain
to “L (0 dB).”
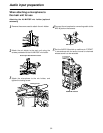
3
If the lens is provided with an extender, disengage
the extender function.
Similarly, if the lens is provided with a ratio
converter, disengage the ratio converter function.
4
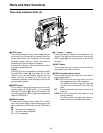
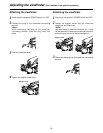
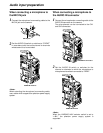
1
Perform the menu operations (pages 72 to 74),
and display the “VF DISPLAY” screen of CAM
MAIN MENU 2.
2
Set ZEBRA1 DETECT to 70%, ZEBRA2
DETECT to 85% and ZEBRA2 to STOP.
(Default setting mode)
3
Press the MENU button and close the menu
screen.
4
Set the ZEBRA switch on the viewfinder to ON.
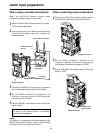
5
Shoot a sheet of white paper devoid of color
irregularities.
<Note>
Since flicker tends to occur under fluorescent
lights, mercury lamps and other such lights, use a
source of light such as sunlight or a halogen lamp
which does not tend to produce flicker.
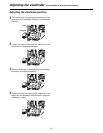
6
Set the lens aperture to manual, and adjust the
lens aperture in such a way that ZEBRA fills the
whole screen.
Check that the lens aperture is between F/4 and
F/11.
<Notes>
O
Since unevenness in the lighting will make it
impossible for ZEBRA to fill part of the screen,
try adjusting the lighting position, etc.
O
Try adjusting the lighting position, etc. also when
the lens aperture is not between F/4 and F/11.
O
Always be sure to leave the electronic shutter at
OFF.