


30
Chapter 4
Adjustments and settings for recording
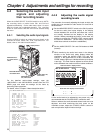
4-4 Selecting the audio input
signals and adjusting
their recording levels
When the AUDIO SELECT CH1/CH2 switch is set to AUTO,
the recording levels on audio tracks CH1 and CH2 are
adjusted automatically. On the other hand, when it is set to
MAN, the levels can be adjusted manually. The recording
levels on audio tracks CH3 and CH4 can be selected using
the menu.
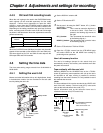
4-4-1
Selecting the audio input signals
Use the AUDIO IN switch to select the input signals to be
recorded on audio tracks CH1, CH2, CH3 and CH4. For
details, refer to “2-2 Audio function section.”
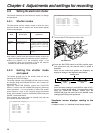
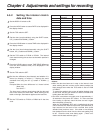
#
< MIC/AUDIO1 >
FRONT VR CH1 :OFF
FRONT VR CH2 :OFF
MIC LOWCUT CH1 :OFF
MIC LOWCUT CH2 :OFF
MIC LOWCUT CH3 :OFF
MIC LOWCUT CH4 :OFF
LIMITER CH1 :OFF
LIMITER CH2 :OFF
AUTO LEVEL CH3 :ON
AUTO LEVEL CH4 :ON
REC CH3/CH4 :SW
CUE REC SELECT :CH1
TEST TONE :NORMAL
#
< MIC/AUDIO2 >
FRONT MIC POWER :ON
REAR MIC POWER :ON
AUDIO OUT :ON
MONITOR SELECT :STEREO
FRONT MIC LEVEL :–40dB
REAR MIC CH1 LVL :–60dB
REAR MIC CH2 LVL :–60dB
REAR LINE IN LVL :+4dB
AUDIO OUT LVL :+4dB
HEADROOM :20dB
WIRELESS WARN :OFF
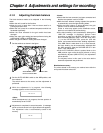
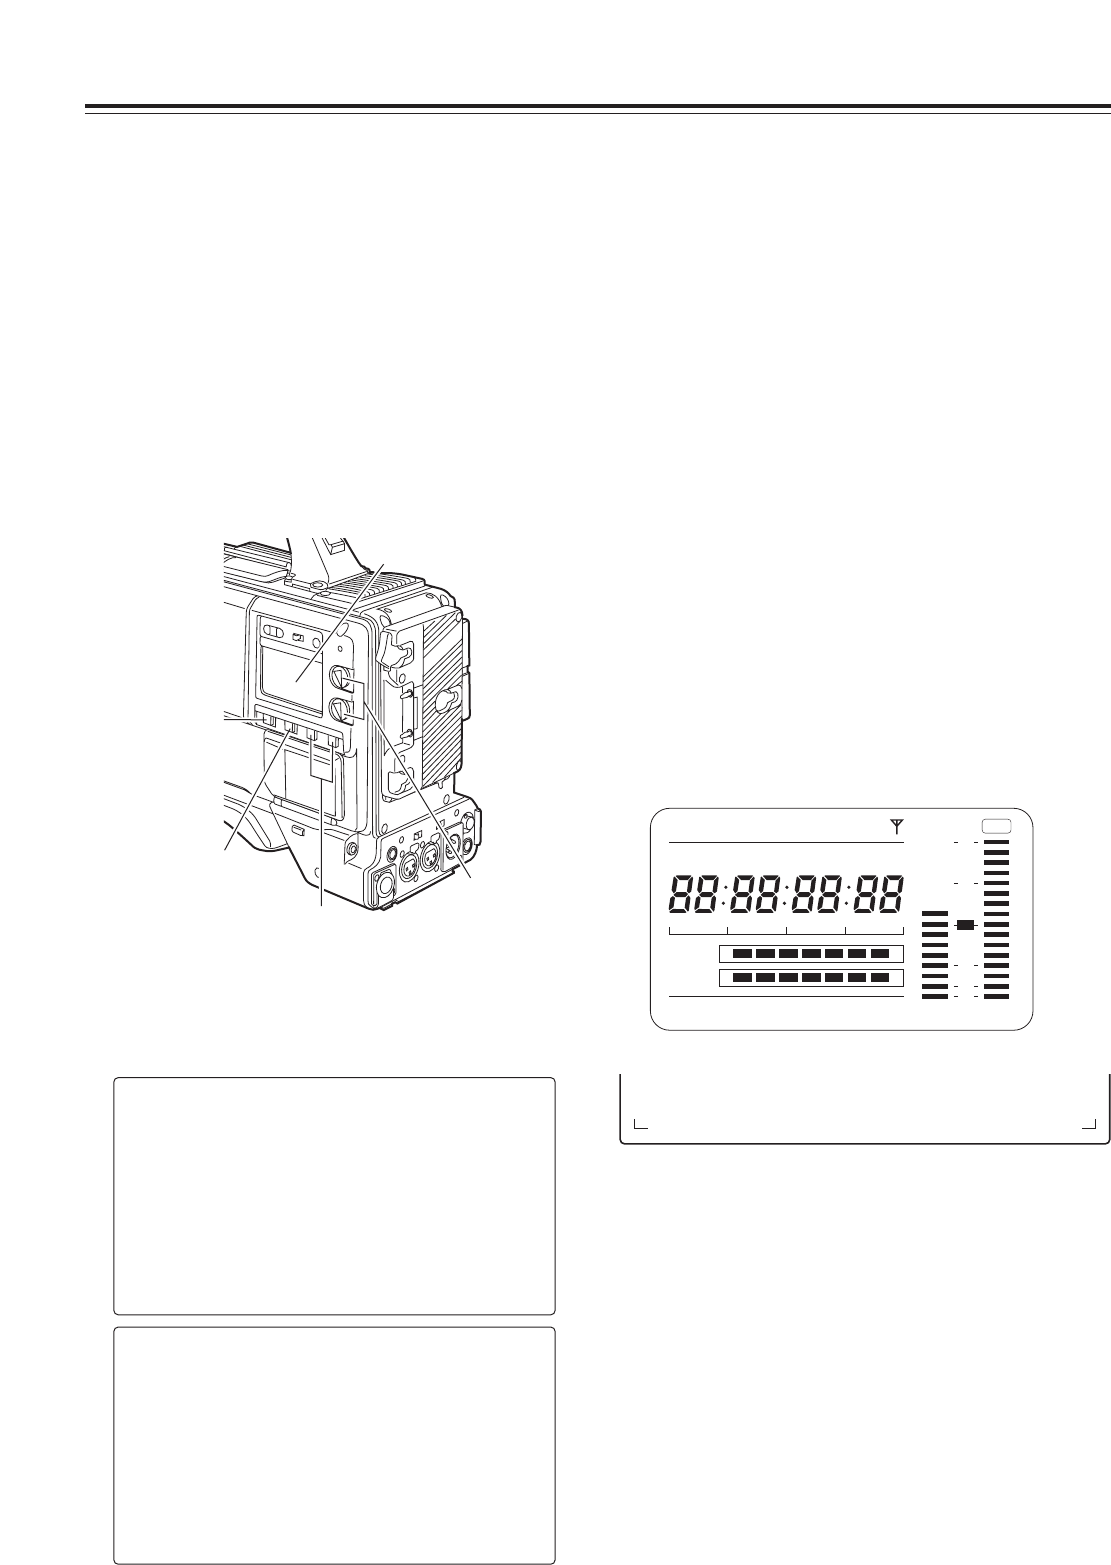
AUDIO LEVEL CH1,
CH2 controls
AUDIO SELECT
CH1, CH2 buttons
MONITOR SELECT CH1&2
/ST/ CH3&4 switch
MONITOR CH1/3 /
ST / CH2/4 selector
switch
Display window
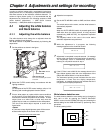
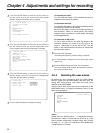
For the detailed audio-related settings, open the
<MIC/AUDIO1> and <MIC/AUDIO2> screens from the VTR
MENU page and select the settings for the items by
performing menu operations.
For details, refer to “Chapter 7 Menu description tables.”
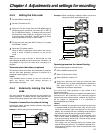
4-4-2 Adjusting the audio signal
recording levels
The procedure for manually adjusting the levels at which the
signals are to be recorded on audio tracks CH1 and CH2 is
set forth below.
1
Set the MONITOR SELECT switch to the CH1/2 position
so that the audio level meter display in the display
window indicates CH1 and CH2, and check that 1 and 2
are actually indicated as the display in the display
window. Before proceeding any further, on the menu, set
whether to activate the F.AUDIO LEVEL controls which
are used for attenuation. (At the factory, the mode in
which these controls are inactive is established.)
2
Set the AUDIO SELECT CH1 and CH2 buttons to MAN
(manual).
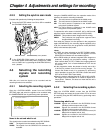
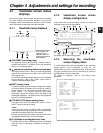
3
While monitoring the audio level meter in the display
window or the audio level meter display inside the
viewfinder, adjust the AUDIO LEVEL CH1 and CH2
controls. If the uppermost bar (0 dB) is exceeded, the
“OVER” display lights up to indicate that the input volume
is too high. The level must be adjusted so that 0 dB will
not be indicated even under maximum volume conditions.
For the audio levels to be adjusted by one person only, it is
recommended that the F.AUDIO LEVEL controls be used.
Select in advance the audio channels whose levels are to be
adjusted, and while monitoring the level meter on the
viewfinder screen, adjust the F.AUDIO LEVEL controls in
such a way that the input will not be too high.
CTL
h
TAPE
EB
Y minM
s
frm
12
0
D
VTCG
TIME DATE
P-iREC
SLAVE HOLD W GPS
BATT
EF
OVER
10
OO
40
-dB
30
20
NDF
F:1----
R:2---- ---+
∫
∫
Audio level meter in display window
Audio level meter display inside viewfinder