


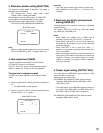
Note:
• Every time the [SEL] button is pressed, the size of the
rectangle cursor changes in the order of large → medi-
um → small.
Select a size to meet the photographic subject size.
x Hold down the [MENU] button for more than 2 seconds.
→ The "MATRIX" screen appears again.
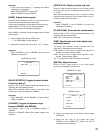
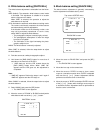
c To perform fine tuning, adjust "GAIN" (chroma) and
"PHASE" (hue).
For example, the adjustment of "PHASE" or "GAIN" of
"R/R-Ye" on the following screen provides the simultane-
ous adjustment of "PHASE" or "GAIN" of the adjacent
axes "R" and "R-Ye" in "Color matrix splitting chart".
Note:
• When the color on the axis in the color matrix splitting
chart is detected, the adjacent axes are not displayed.
[CHROMA GAIN] Adjusts chroma gain.
Be sure to view a vector scope or a color video monitor
when the chroma gain is adjusted with use of the [e] or
[f] button.
When the level indicator moves in the "+" direction, the
chroma level becomes higher. When the level indicator
moves in the "–" direction, the chroma level becomes lower.
[TOTAL PED] Adjusts the pedestal level.
Be sure to view a waveform monitor or a color video monitor
when the pedestal level is adjusted with use of the [e] or
[f] button.
When the level indicator moves in the "+" direction, the
image becomes brighter. When the level indicator moves in
the "–" direction, the image becomes darker.
22
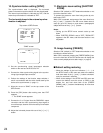
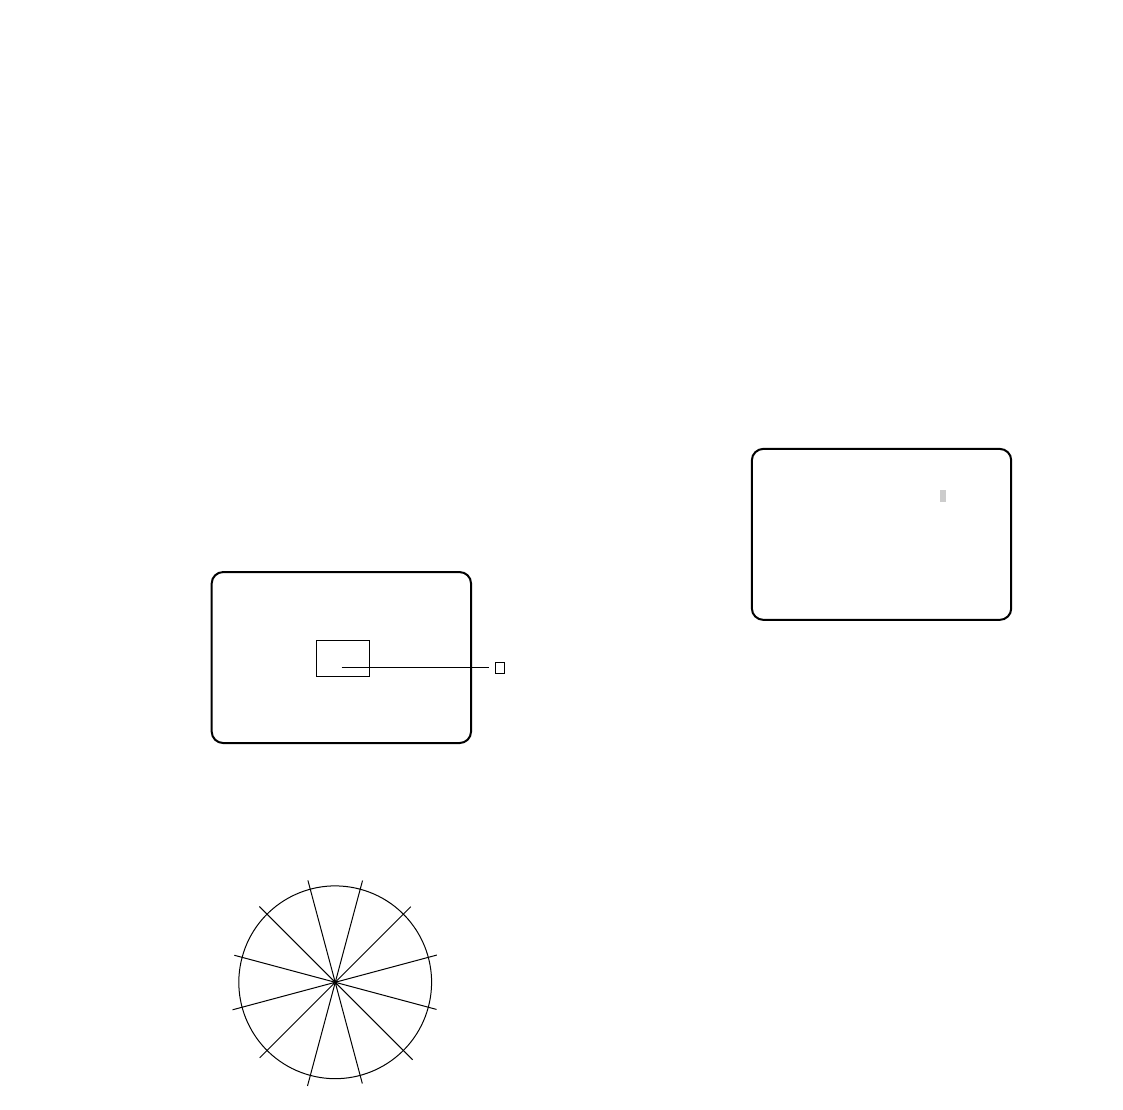
USER (default),B-Mg, Mg, Mg-R, R, R-Ye, Ye, Ye-G, G,
G-Cy, Cy, Cy-B, and B
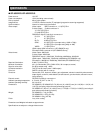
c Press the [SEL] button after axis selection.
→ The "MATRIX" screen appears.
v To perform fine tuning, use the [e] or [f] button to
adjust "GAIN" (chroma) and "PHASE" (hue).
When the color axis is unclear
When "USER AREA" is selected on the "MATRIX" screen,
the axis is automatically displayed by selecting a color on
the screen.
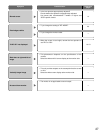
Color selection is performed on the color detection screen.
The white rectangle cursor is blinking to select a target
color on the color detection screen.
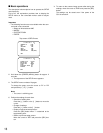
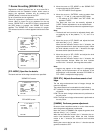
<Color matrix splitting chart>
* This chart is a guideline for displaying the closest axis
at adjustment.
z Point the camera at the center of the photographic sub-
ject with which the color is detected.
If the camera is immovable, move the rectangle cursor
to the area with a target color with use of the [g], [h],
[e], and [f] buttons.
R-Ye
Cursor
(Blinking)
Color detection screen
B
B-Mg
Mg
Mg-R
R
R-Ye
Ye-G
G
Ye
G-Cy
Cy-B
Cy
** MATRIX ** USER
R/R-Ye PHASE –
....
|
....
+
R PHASE –
....
|
....
+
R-Ye PHASE –
....
|
....
+
R/R-Ye GAIN –
....
|
....
+
R GAIN –
....
|
....
+
R-Ye GAIN –
....
|
....
+
USER AREA *
RET END