


60
Set the privacy zone
When there is a zone that is not to be displayed, set the zone as a privacy zone to not to display.
Up to 8 privacy zones can be set.
Step 1
Move the cursor onto "PRIVACY ZONE" on the "CAM-
ERA SETUP" page and press the [SET] button after
selecting "ON (1)" or "ON (2)".
→ The zone number selection page will be displayed.
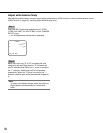
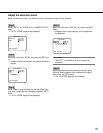
Step 2
Confirm that the cursor is on "1" of "1/8" displayed on
the top of the page, and then press the [Left] button or
[Right] button to select the desired zone number.
When an asterisk (*) is displayed next to the zone num-
ber, the selected zone number is already in use.
Step 3
After completing the zone number selection, press the
[SET] button.
→ The zone setting page will be displayed.
Notes:
• When selected the zone number already in use in
step 3, images inside of the respective zone that is
set on the zone setting window will be displayed. By
performing steps 4 and 5, the set zone will be can-
celled and a new zone will be set.
• To cancel the zone settings, press the [SET] button
after moving the cursor onto "DEL".
The zone settings will be cancelled.
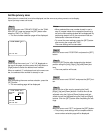
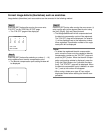
Step 4
Move the cursor onto "POSITION" and press the [SET]
button.
Step 5
Press the [SET] button after designating the desired
position using the [Left], [Right], [Up] and [Down] but-
tons.
→ The zone position will be set.
Step 6
Move the cursor onto "SCALE" and press the [SET] but-
ton.
Step 7
Adjust the size of the zone by pressing the [Left],
[Right], [Up] and [Down] buttons. Vertical size can be
adjusted using the [Up] and [Down] buttons and hori-
zontal size can be adjusted using the [Left] and [Right]
buttons. Click the [SET] button after completing the set-
tings.
Step 8
Move the cursor onto "SET" and press the [SET] button.
→ The privacy zone settings will be complete and the
zone number selection page will be displayed.
**ZONE NUMBER 1/8**
RET TOP END
**ZONE NUMBER 1/8**
POSITION PUSH SW
SCALE PUSH SW
SET DEL
RET TOP END