


C1448M-F (9/08) 5
Installation
PARTS LIST
Qty Description
1 Back box, trim ring, and dome
1 Compass tool
1 Safety chain bracket
1 1/4-20 x 1/2-inch bolt
1 1/4-inch flat washer
1 1/4-inch lock washer
HARD CEILING
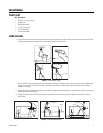
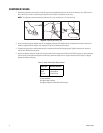
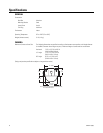
1. Locate the center point of the mounting location. Drill a hole in the ceiling using a 3/32-inch drill. Insert the compass tool into the hole. Use
a pencil and the compass tool to draw a circle on the ceiling. Carefully cut out the circle.
Figure 1. Preparing the Ceiling
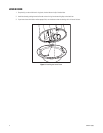
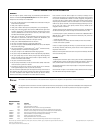
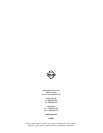
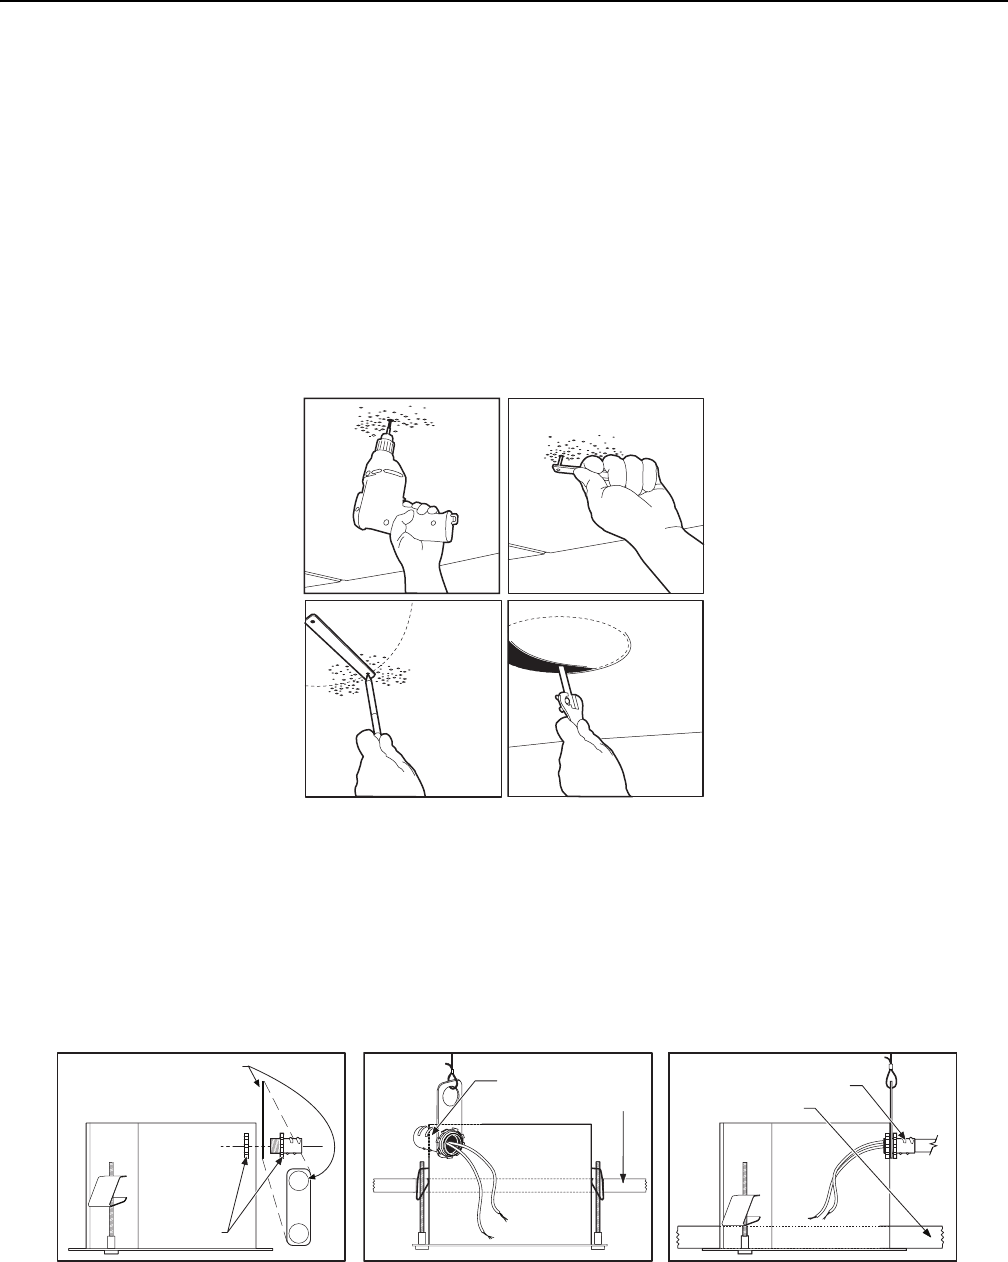
2. Attach a conduit fitting (not supplied), lock nut (not supplied), and safety chain bracket. Install a safety chain/cable (not supplied) that will
support up to 16 pounds (7.3 kg). Install one end of the safety chain/cable to the safety chain bracket and the other end to a support
structure in the ceiling.
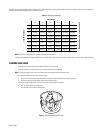
3. Prepare the wiring for camera and lens power; refer to Table A on page 6 and Table B on page 7 for wiring distances. Pull the wiring into the
back box through the conduit fitting.
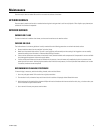
4. Compress the spring clips on the back box and push it through the hole until the clips spring back. Tighten the screws until you hear a
clicking noise.
Figure 2. Installing the Back Box
ATTACH SAFETY CHAIN HERE
NOT SUPPLIED
CEILING
NOT SUPPLIED
NOT SUPPLIED
CEILING