C2969M-B (8/10) 9
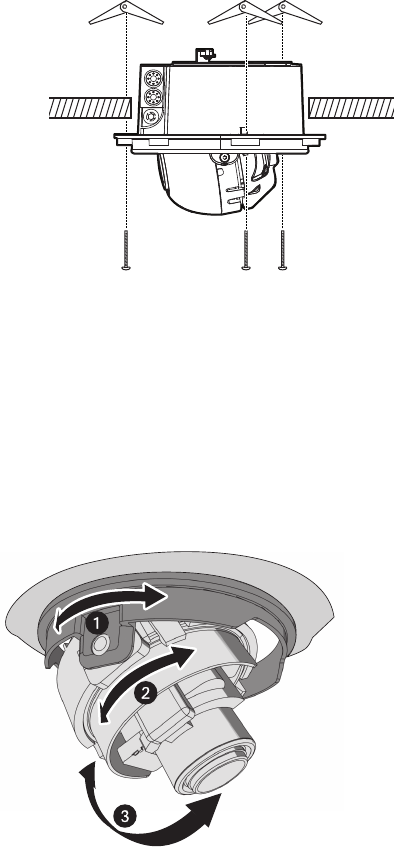
6. Use 8-32 toggle bolts (not supplied) to attach the back box to the mounting surface.
NOTE: Install the toggle bolts through the threaded holes in the back box.
Figure 5. In-Ceiling Installation
7. Apply power to the camera. The camera will complete a configuration sequence: the green LED
flashes five times per second for approximately two minutes and then turns solid after the sequence
is complete.
NOTE: If the camera is not connected to a DHCP server and DHCP is enabled, the configuration
sequence might take up to five minutes to complete.
8. Position the camera
a. View the camera image using the service port or a Web browser.
b. Manually rotate and tilt the camera module to position the camera. Do not over-rotate the
module.
Figure 6. Positioning the Camera
ì
Pan 368°
î
Rotate 355°
ï
Tilt 160°


