28 C2641M-A (9/07)
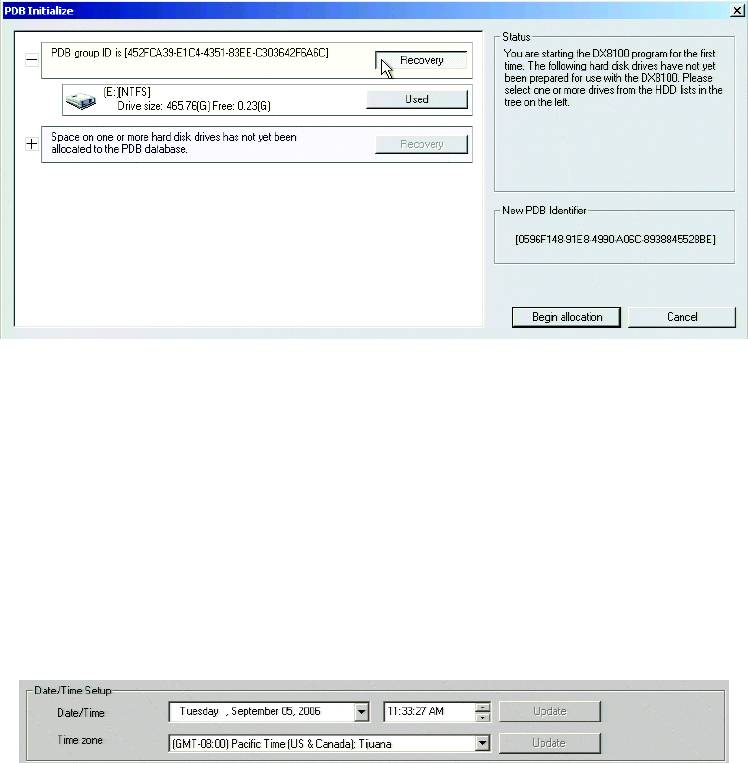
• If you are updating an existing system and you want to save previously recorded video, select Recovery on the PDB Group ID box.
In this case, all of the boxes should turn yellow and the individual drives should have Used selected. This step will save your recorded
video.
Figure 36. PDB Initialization Screen with Recovery Active
• If you are installing this system for the first time, make sure that Allocation is selected on each of the individual disk drives in the tree.
This step will erase all data on all of the drives.
7. Click Begin Allocation to start the database initialization. Depending on the drive configuration, the DX8100 will take between 5 and 15
minutes to initialize the database and begin operation.
8. Important: Perform the following steps immediately after the DX8100 completes the initialization process, restarts, and begins operation.
a. From the DX8100 toolbar, click the Setup icon.
b. Click the System icon
c. In the Date/Time Setup area of the System Setup page, verify that the DX8100 date, time, and time zone settings are correct.
Figure 37. DX8100 System Page Date/Time Setup Area
RESTORING THE DVR SETTINGS
ENTERING NETWORKING SETTINGS
NOTE: If “Obtain an IP Address Automatically” was previously selected, skip this section.
1. From the DX8100 toolbar, click the Setup icon.
2. In the Setup dialog box, click Network.
3. Deselect “Obtain an IP Address Automatically.”
4. Type the IP address, subnet mask, and default gateway address that you previously recorded.
5. If applicable, enter the multicast group IP address.
