30 PELCO Manual C460M-E (7/95)
17.0 PAN/TILT ASSEMBLY
INSTALLATION
This section covers the installation of the ED28KIT in
retrofitting a non-pan/tilt-equipped ED28 and ED28-1
or ED29/ED29-1/ED29-3 Harris Dome with a pan/tilt
assembly unit. Please read through and understand the
installation instructions before proceeding with the in-
stallation.
NOTE: When installing a pan/tilt unit to a dome
enclosure, it is recommended that one of the fol-
lowing pan/tilt assembly units be used in the instal-
lation:
PT2801000ASSY – for non-PP operation
PT2801001ASSY – for SL operation
PT2801002ASSY – for PP operation
PT2801003ASSY – for SL/PP operation
(The pan/tilt assembly must be ordered separately.)
Before proceeding with the installation, make sure you
have the following:
(1) P/T assembly mounting bracket,
PM200C4000COMP
(1) Dome Drive Bracket,
SB34105COMP
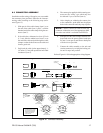
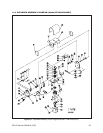
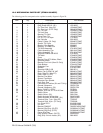
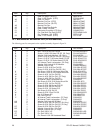
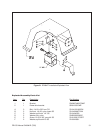
See Figure 21 for the assorted mounting hardware part
numbers and quantities.
NOTE: If you are working with a SL (360°) pan/
tilt assembly unit (PT2801001ASSY, or
PT2801003ASSY), skip to step 2 in the following
instructions.
1. Install the pan and tilt assembly mounting bracket
to the top of the pan and tilt unit using the (3)
mounting screws and washers as shown in Figure
21.
Make sure the bracket is oriented such that when
the pan and tilt assembly is mounted to it, the front
of the pan and tilt unit will face toward the viewing
slot in the enclosure dome.
2. Install the dome drive bracket to the top of the pan
and tilt assembly using the (2) mounting screws
and washers as shown in Figure 21.
Again, make sure the dome drive bracket is ori-
ented correctly so the front of the pan and tilt
assembly will face the viewing slot in the dome
enclosure.
3. Mount the pan and tilt assembly, with the installed
dome drive bracket and the assembly mounting
bracket, to the inside of the enclosure. Make sure
the direction of the pan and tilt assembly is oriented
properly.
4. Make sure all hardware is tightened securely.
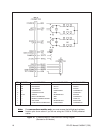
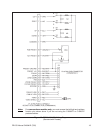
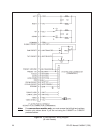
5. Make the proper electrical connections.
NOTE: Refer to Installation/Operation manual
C460M for complete wiring and operation infor-
mation.
6. Close the dome, aligning the dome drive bracket
with the drive tab on the edge of the dome.


